The WinSxS folder, also known as the Windows Side by Side folder, is a crucial component of the Windows operating system. It contains important system files, libraries, and resources that are required for the smooth functioning of Windows. Over time, this folder can accumulate a significant amount of data, resulting in increased disk usage. Cleaning up the WinSxS folder can help free up valuable disk space and improve system performance. In this guide, we’ll show you how to clean up the WinSxS folder in Windows 11.
However, please note that the WinSxS folder contains essential system files, and deleting the wrong files can potentially cause system instability or software malfunctions. Therefore, it’s crucial to follow the instructions carefully and exercise caution while performing any cleanup operations.
Let’s delve into the steps required to safely clean up the WinSxS folder in Windows 11 and optimize your system’s disk usage.
Note: Cleaning up the WinSxS folder requires administrative privileges, so ensure that you are logged in as an administrator before proceeding.
What is the WinSxS folder ?
The WinSxS (Windows Side-by-Side) folder is a crucial component of the Windows operating system starting from Windows Vista and later versions, including Windows 7, Windows 8, and Windows 10. It contains a significant portion of the operating system’s core components, including system files, libraries, and various versions of dynamic-link libraries (DLLs).
The WinSxS folder is designed to address the issue of DLL conflicts that were prevalent in earlier versions of Windows. In previous versions, when multiple applications required different versions of the same DLL, conflicts could arise. The WinSxS folder helps mitigate these conflicts by allowing multiple versions of DLLs to coexist on the system, each in its separate subfolder within WinSxS.
The folder’s location is typically “C:\Windows\WinSxS” and can occupy a significant amount of disk space due to the duplication of files. However, it’s important to note that most of the files within the WinSxS folder are hard links, which means they do not consume additional physical storage. Instead, they are pointers to the actual files stored elsewhere on the system.
Clean Up WinSxS Folder using Disk Cleanup Tool
To clean up the WinSxS folder using the Disk Cleanup tool in Windows, you can follow these steps:
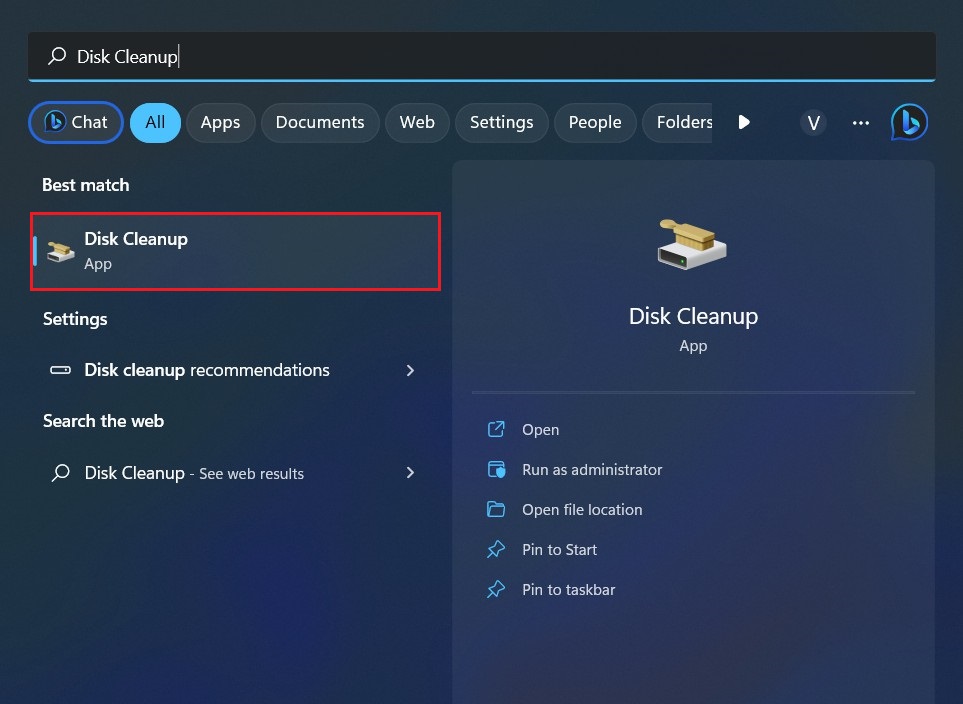
1. Click on the Start button, and type “Disk Cleanup” in the search bar. From the search results, click on Disk Cleanup to open the tool.
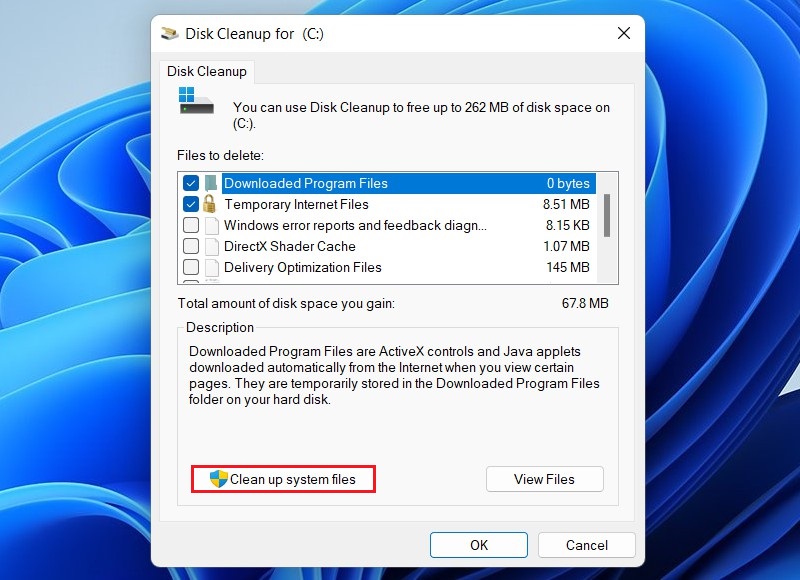
2. Select the drive where Windows is installed (usually the C: drive) and click OK.
3. In the Disk Cleanup window, click the Clean up system files button.
4. Check the “Windows Update Cleanup” option (you can select other options as well if desired), and click OK to start the cleanup process.
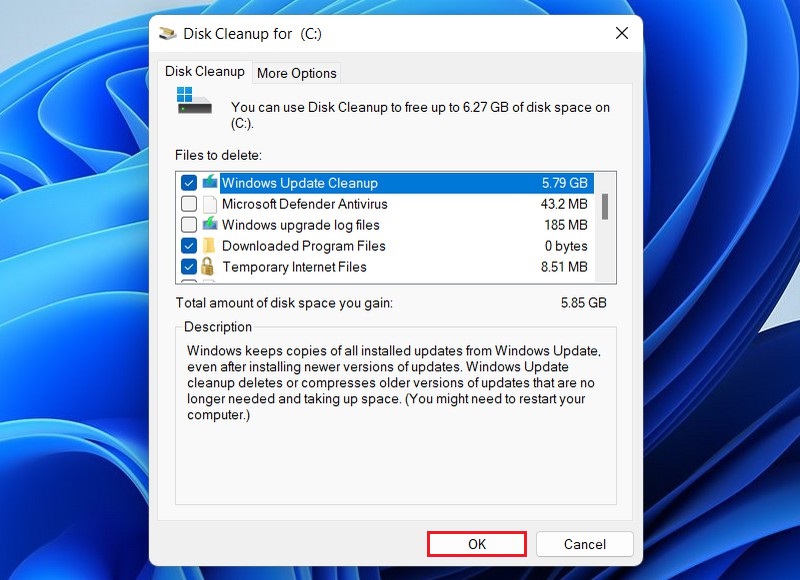
The Disk Cleanup tool will now clean up the selected files, including the unnecessary ones in the WinSxS folder. This process may take a while, so please be patient.
Read more: 10 Best Registry Cleaner for Windows 10
Clean Up WinSxS using (DISM) tool
If the Disk Cleanup tool did not sufficiently reduce the size of the WinSxS folder, you can try using the Deployment Image Servicing and Management (DISM) tool. Follow these steps:
1. Click on the Start button and search for “Command Prompt”. Next, right-click the Command Prompt and select Run as administrator.

2. In the Command Prompt window, type the following command and press Enter:
dism /online /cleanup-image /startcomponentcleanup
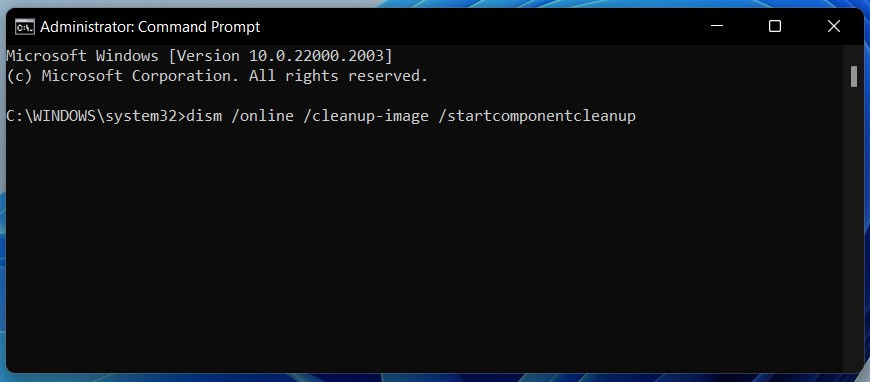
The DISM tool will analyze your system and remove any unnecessary files from the WinSxS folder. This process may take some time to complete. Once the process is finished, close the Command Prompt window.
Clean Up WinSxS Folder using Storage Sense
To clean up the WinSxS folder using Storage Sense in Windows 11, you can follow these steps:
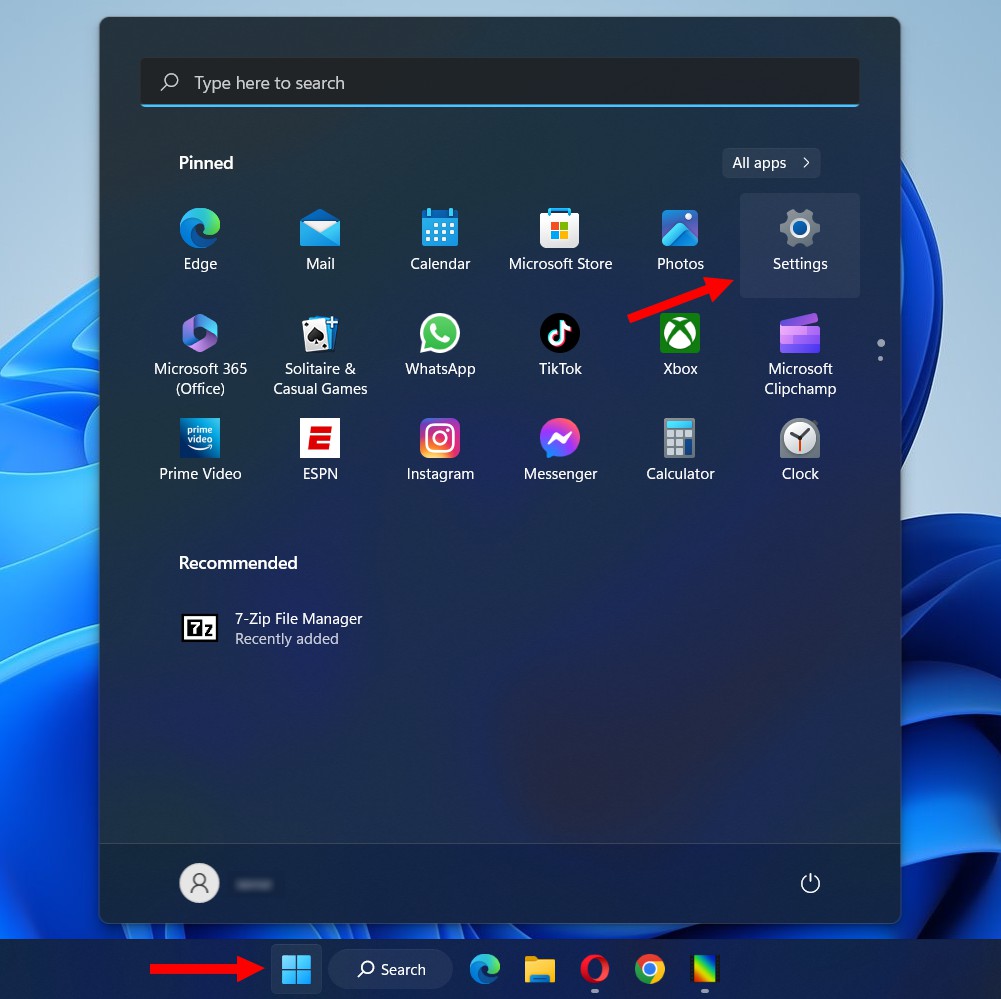
1. Open the Start menu and click on the Settings (gear icon).
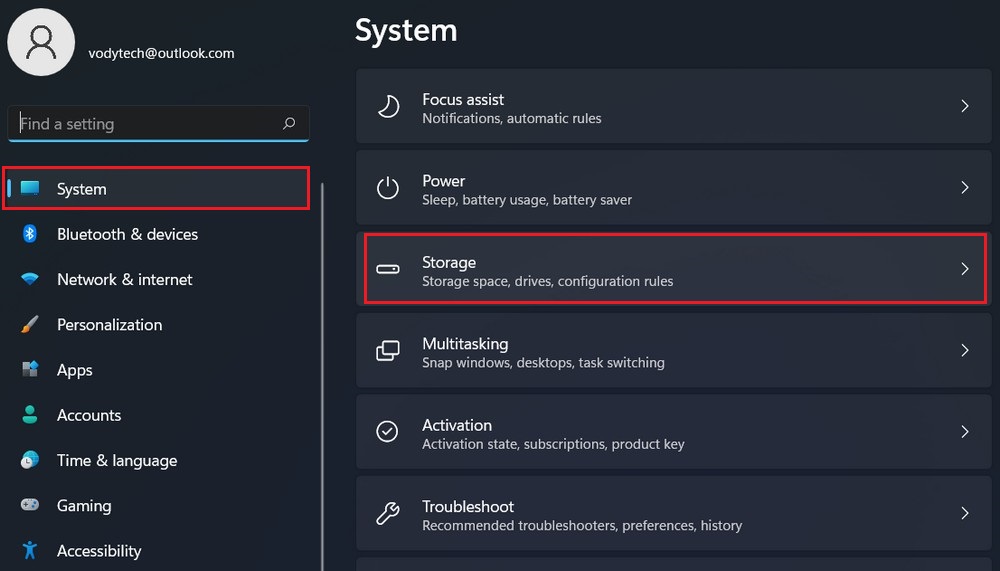
2. In the Settings app, click on the System category.
3. In the left sidebar, select the Storage option.
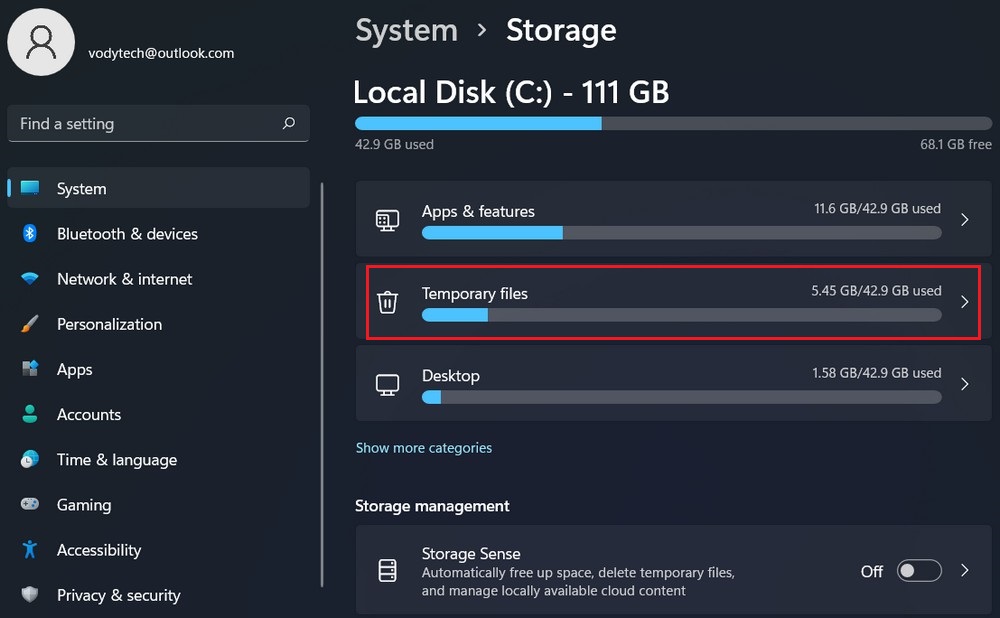
4. Click on the Temporary files section.
5. Review the list of files and select the “Windows Update Cleanup” and “Windows upgrade log files” options (you can select other options as well if desired).
6. Once you’ve made your selection, click on the Remove files button.
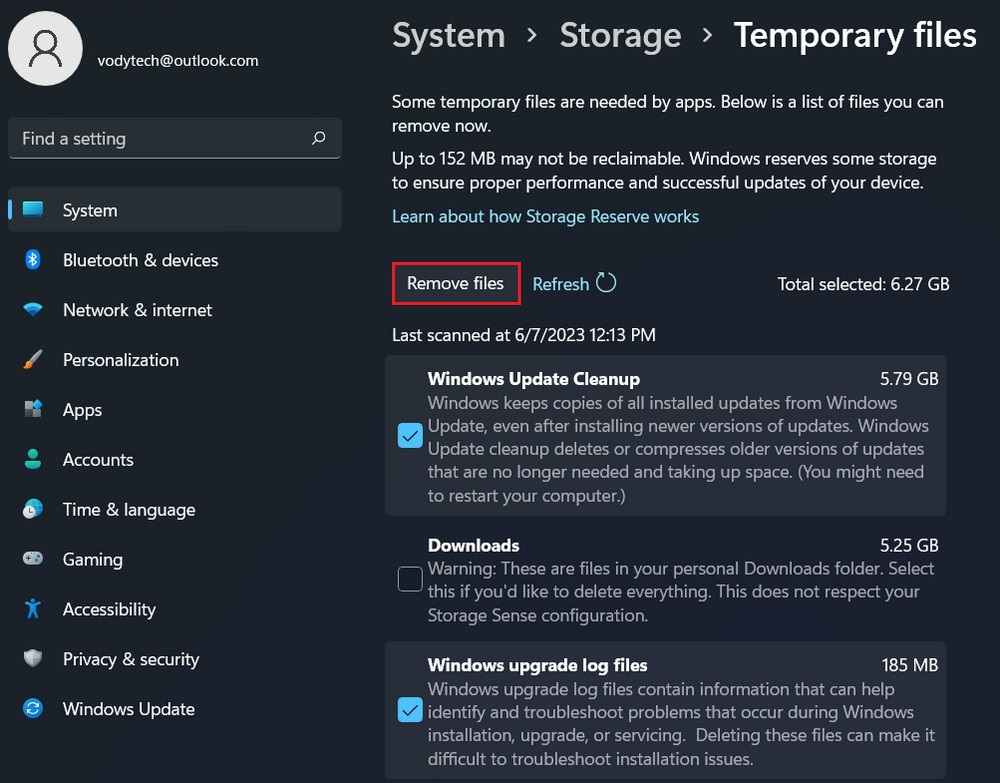
Please note that cleaning up the WinSxS folder can free up a significant amount of disk space, but it’s important to understand that some files in the folder are necessary for Windows to function correctly. Storage Sense is designed to safely remove unnecessary files.
Read more: How to view update history on Windows 11
Cleaning up the WinSxS folder in Windows 11 can help you free up valuable disk space on your system. By using the Disk Cleanup tool, the DISM tool, and the Windows Update Cleanup option, you can efficiently remove unnecessary files and libraries stored in the WinSxS folder.


