
If you’re using a Windows 11 PC, it’s important to keep your system up to date with the latest updates and security patches. However, sometimes you may want to know more about the updates that have been installed on your PC, such as when they were installed and what changes they made. Fortunately, Windows 11 makes it easy to view your update history. In this article, we’ll walk you through the steps to view your update history on Windows 11.
How to View Update History in Windows 11
Step 1. Open the Windows Settings app.
To view your update history, you’ll need to open the Windows Settings app. You can do this by clicking on the Start menu and selecting the gear icon in the lower left corner, or by pressing the Windows key + I on your keyboard.
Step 2. Open the Windows Update settings.
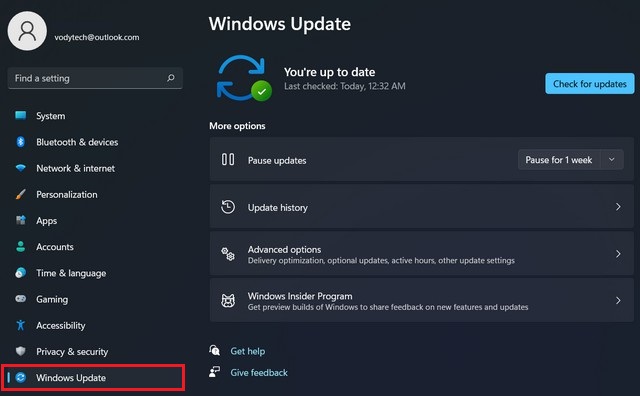
Once you have the Windows Settings app open, click on “Windows Update” in the left-hand menu. This will take you to the Windows Update settings page.
Step 3. View your update history.
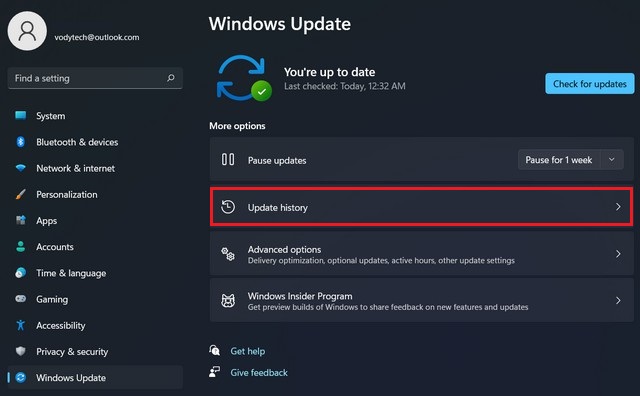
On the Windows Update settings page, you’ll see a section “More options.” Click on “Update history” near the top of the page to see a list of all the updates that have been installed on your PC.
Step 4. Check the status and date of each update.
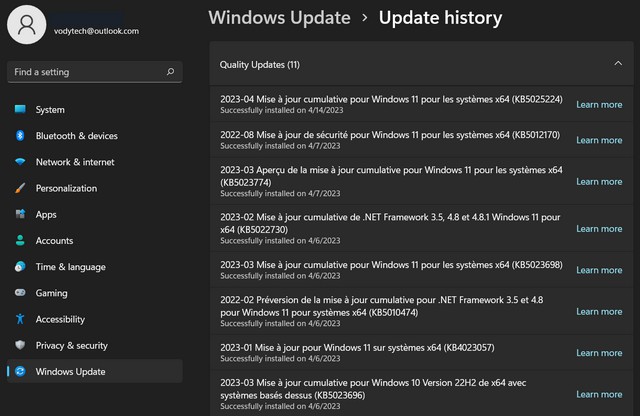
In the update history list, you’ll see all the updates that have been installed on your PC, with the most recent updates listed first. Each update will have a “Status” column that tells you whether the update was successful or not, and a “Date” column that tells you when it was installed.
Step 5. Expand an update for more details.
If you want to see more information about a particular update, you can click on its name to expand it. This will show you details like the update’s KB number, the type of update it is (e.g. security update, feature update), and a brief description of what it does.
Step 6. Close the Settings app.
When you’re finished viewing your update history, you can close the Settings app.
Conclusion
Viewing your update history can be a helpful way to keep track of the updates that have been installed on your Windows 11 PC. It can also be useful if you’re troubleshooting an issue on your PC and want to see if a particular update might be the cause. With these simple steps, you can easily view your update history on Windows 11 and stay up to date with the latest changes and improvements to your system. If you have any questions, please let us know in the comments. Also, check this guide if you want to learn How to Uninstall an Application on Windows 11.


