
Windows updates are essential for keeping your operating system secure and up to date with the latest features and improvements. However, over time, these updates can accumulate and consume valuable disk space on your computer. In Windows 11, you can easily delete unnecessary Windows update files to free up storage and optimize your system’s performance. In this article, we will guide you through the process of deleting Windows update files in Windows 11/10.
Delete Windows Update Files by Disk Cleanup
To delete Windows update files, you can follow these steps:
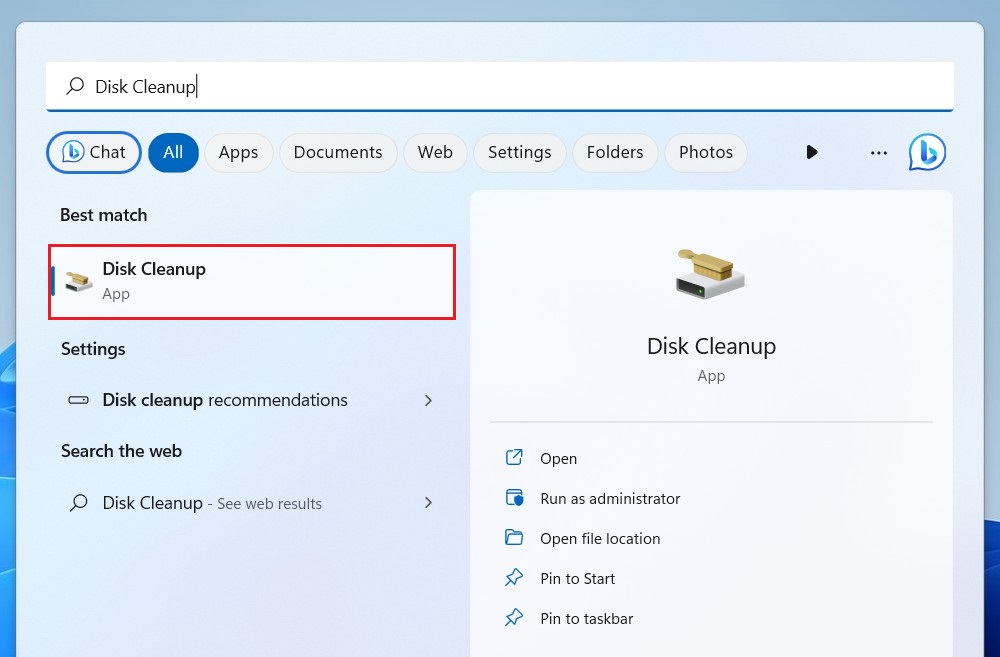
- Click on the Start button, in the search bar, type “Disk Cleanup” and select the Disk Cleanup app from the search results.
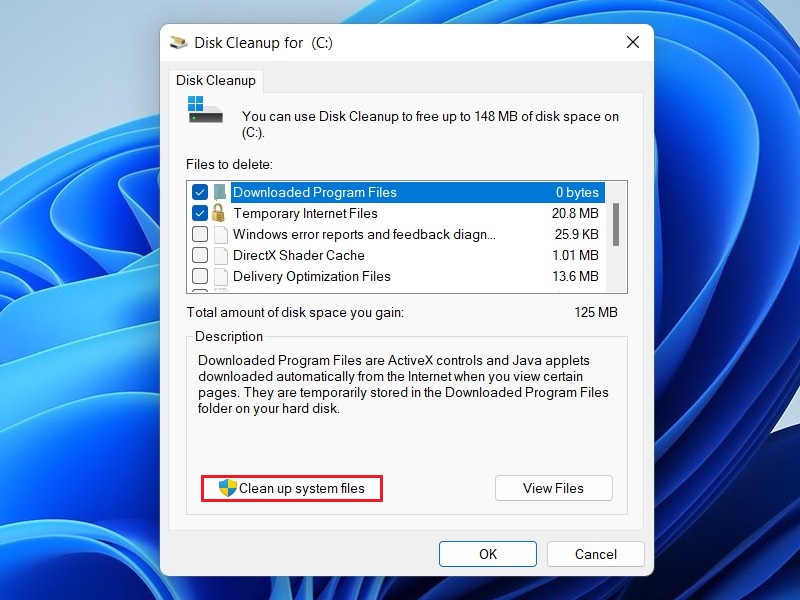
- Select the drive where the Windows operating system is installed and click the OK button.
- Click on the Clean up system files button.
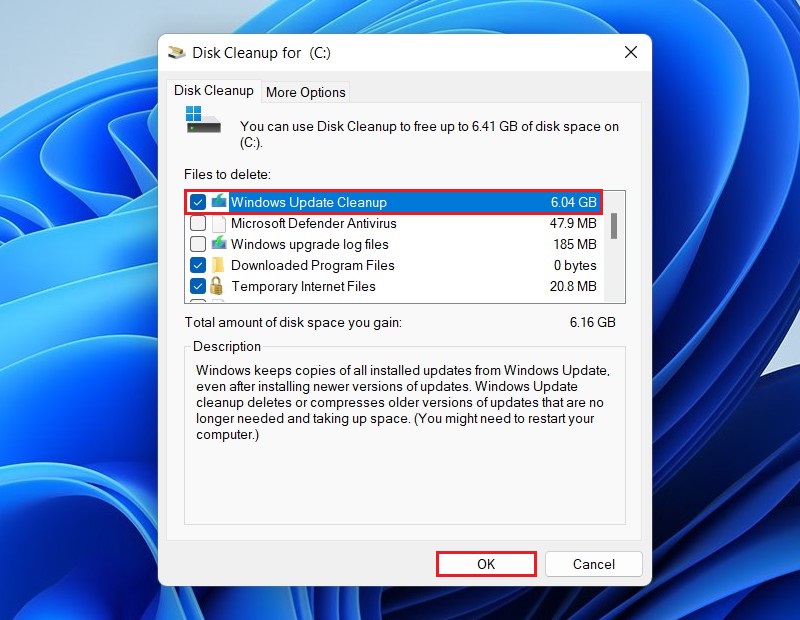
- Check the box next to Windows Update Cleanup and any other categories you want to clean up.
- Click on the OK button.
- A confirmation dialog will appear asking if you want to permanently delete these files. Click Delete Files to proceed.
Disk Cleanup will delete the Windows update files along with any other selected categories. This process may take a while depending on the amount of data to be cleaned up.
Delete Windows Update Files from Settings
To delete Windows Update files from the Settings app in Windows, you can follow these steps:
- Open the Settings app by pressing the Windows key + I on your keyboard or by searching for “Settings” in the Start menu.
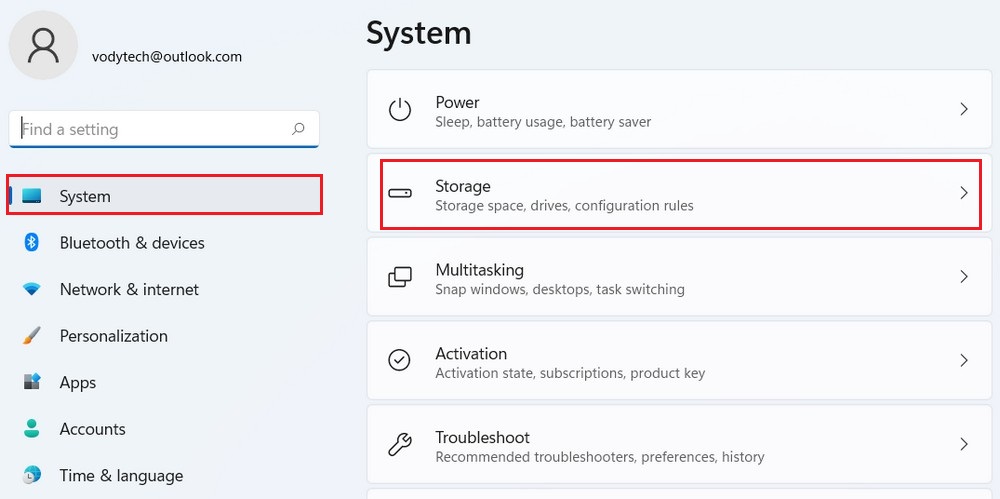
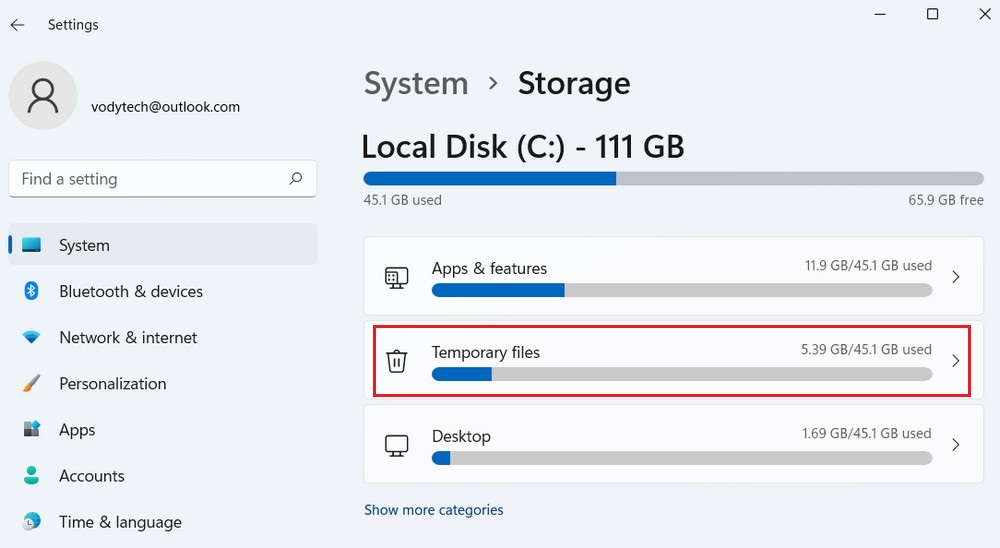
- In the Settings window, click on System.
- Click the Storage tab.
- Click on Temporary files.
- On the next screen, you’ll see various categories of files. Look for Windows Update Cleanup and click on it.
- Click on the Remove files button.
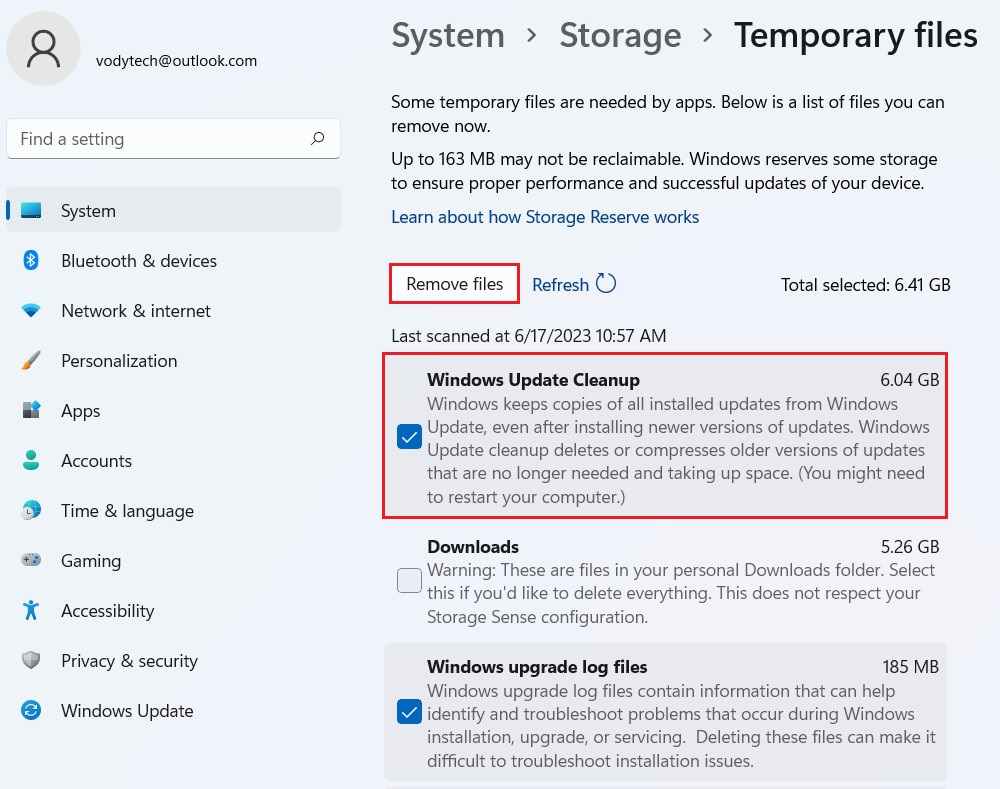
- A confirmation window will appear, asking if you want to permanently delete these files. Click on the Continue button.
Windows will then delete the Windows Update files from your system, freeing up space on your hard drive.
Delete the SoftwareDistribution Folder
The SoftwareDistribution folder is a directory on Windows operating systems (Windows 11, Windows 10, and Windows 7) that is used by the Windows Update service. It stores temporary files, downloaded updates, and installation files for Windows updates.
To delete SoftwareDistribution folder, you can follow these steps:
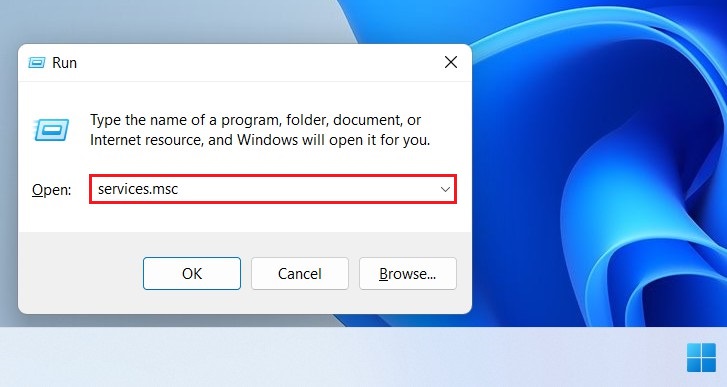
- Press the Windows key + R on your keyboard to open the Run dialog box.
- Type services.msc and press Enter.
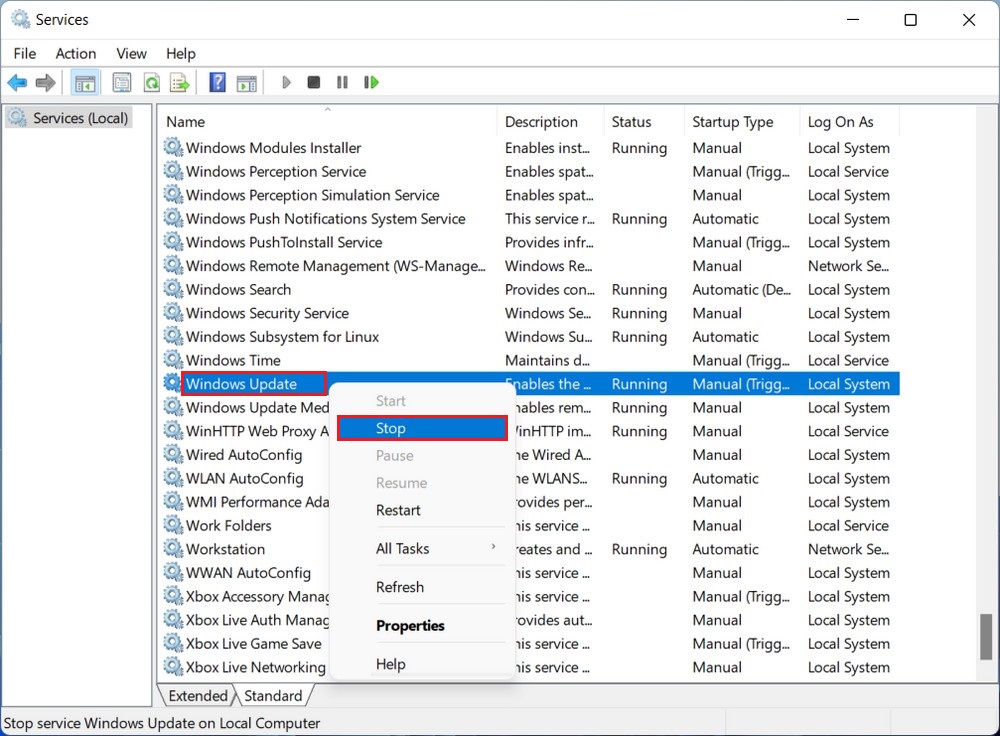
- Right-click on the Windows Update service and select Stop from the context menu.
- Now, open File Explorer by pressing Windows key + E.
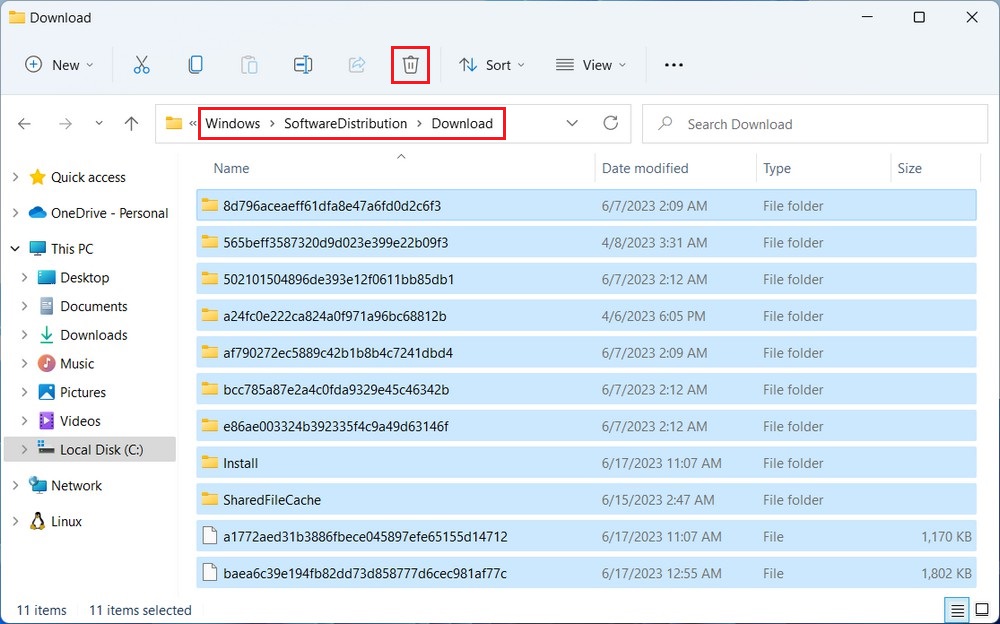
- In File Explorer, navigate to the following path: C:\Windows\SoftwareDistribution\Download.
- Select all the files and folders inside it and click the Delete icon.
- Go back to the Services window, right-click on the Windows Update service, and select Start from the context menu.
Read more: How to disable automatic updates on Windows 11
By following these steps, you will have deleted the Windows update files from your system. Keep in mind that deleting these files will remove the downloaded update files and might require you to download them again if you want to install any pending updates in the future.


