
Windows 11 is the latest operating system from Microsoft, and it comes with a host of new features and improvements. One of the features that many users may find annoying is the automatic update feature. While automatic updates can be helpful in keeping your system up-to-date and secure, they can also interrupt your work or use up your data allowance. Fortunately, there are ways to disable automatic updates on Windows 11. In this article, we will guide you through the process.
Disable automatic updates on Windows 11
Method 1: Using the Settings App
The first method to disable automatic updates on Windows 11 is to use the Settings app. Here are the steps:
1. Open the Settings app by clicking on the Start button and selecting the gear icon in the Start menu or pressing Windows key + i.
2. Click on “Windows Update” in the left-hand sidebar.
3. Under the “More options” click the “Pause for 1 week” button to disable automatic updates for the “Pause updates” setting.
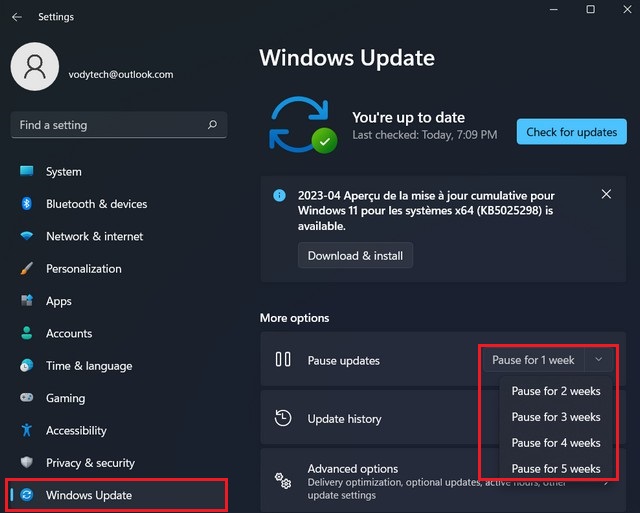
4. If you want to pause updates for a longer period, click on the drop-down menu under “Pause for” and select the number of days you want to pause updates for. You can pause updates for up to 35 days.
Method 2: Using Group Policy Editor
If you’re using Windows 11 Pro, Enterprise, or Education, you can use the Group Policy Editor to disable automatic updates. Here are the steps:
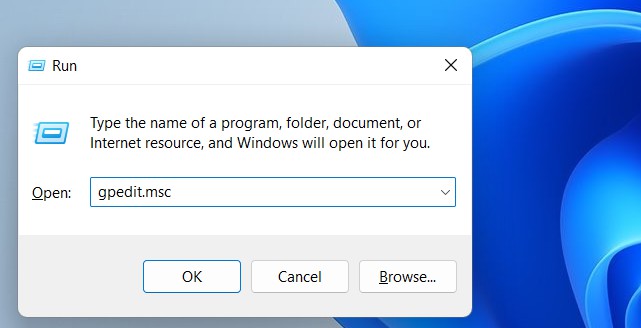
1. Press Windows key + R to open the Run dialog box.
2. Type “gpedit.msc” (without the quotes) and press Enter.
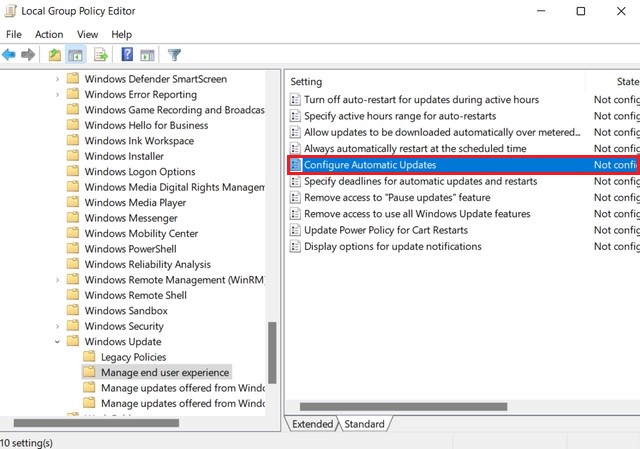
3. In the Group Policy Editor, navigate to Computer Configuration > Administrative Templates > Windows Components > Windows Update.
4. Open the “Manage and user experience” folder.
5. Double-click on Configure Automatic Updates.
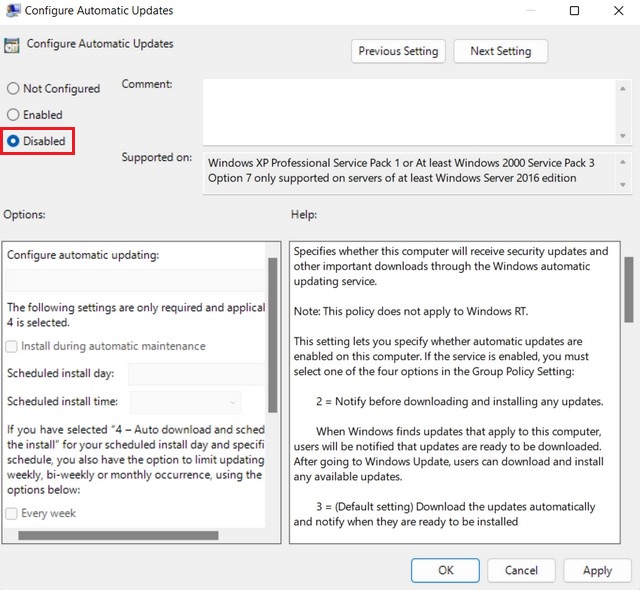
6. Select “Disabled” and click on OK.
Method 3: Disable automatic updates from Registry
If you’re using Windows 11 Home or another edition that doesn’t include the Group Policy Editor, you can use the Registry Editor to disable automatic updates. Here are the steps:
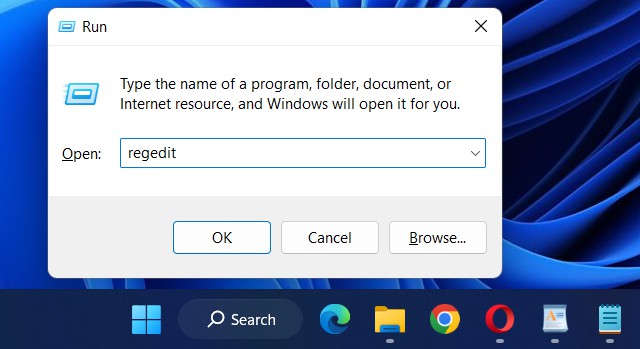
1. Press Windows key + R to open the Run dialog box.
2. Type “regedit” (without the quotes) and press Enter.
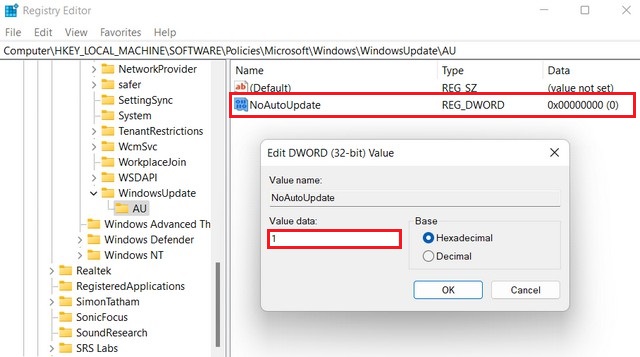
3. In the Registry Editor, navigate to HKEY_LOCAL_MACHINE\SOFTWARE\Policies\Microsoft\Windows.
4. Right-click on the Windows folder and select New > Key.
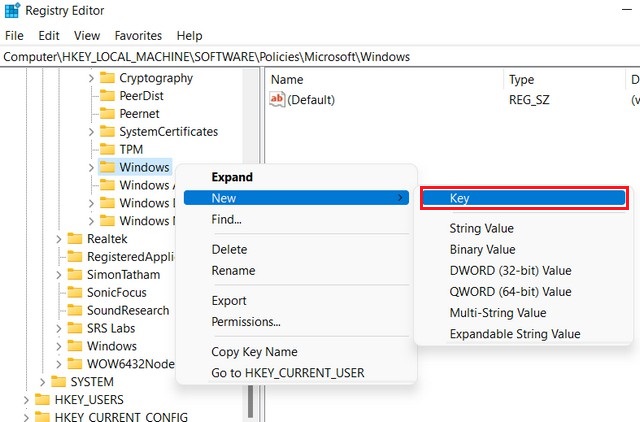
5. Name the new key WindowsUpdate (without the quotes).
6. Right-click on the “WindowsUpdate” folder and select New > Key.
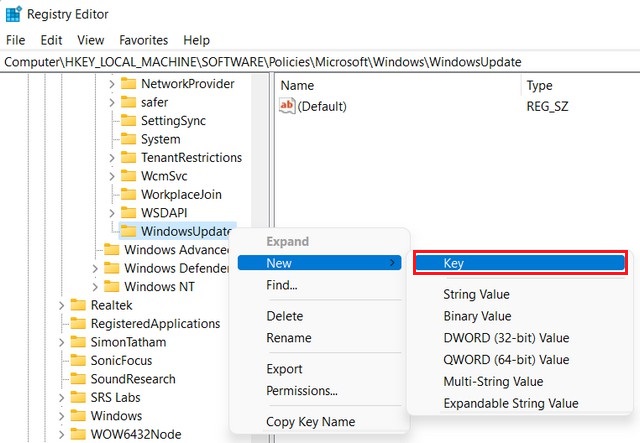
7. Name the key AU and press Enter.
8. Right-click on the “AU” folder and select New > DWORD (32-bit) Value.
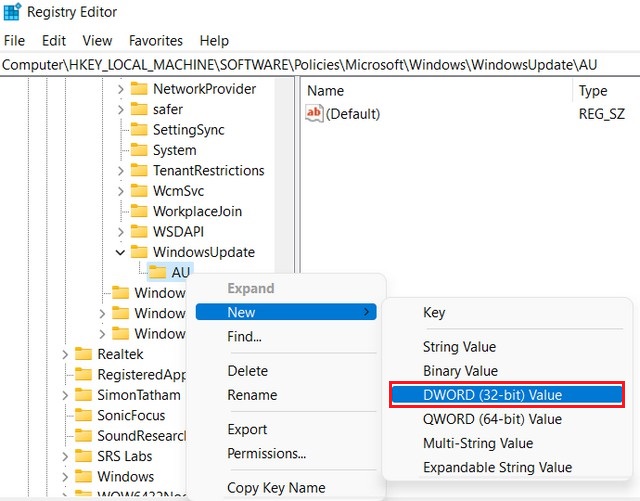
9. Name the new key NoAutoUpdate and press Enter.
10. Double-click on “NoAutoUpdate” and set the value data to 1. This will disable automatic updates.
11. Restart the computer.
Disabling automatic updates on Windows 11 can be helpful if you want to have more control over when updates are installed or if you have limited internet bandwidth. You can use the Settings app, Group Policy Editor, or Registry Editor to disable automatic updates, depending on your Windows 11 edition. Keep in mind that disabling automatic updates can leave your system vulnerable to security risks, so make sure to manually check for updates regularly to ensure your system is up-to-date and secure. If you have any questions or suggestions, please let us know in the comments section. Also, check this guide where you will learn How to view update history on Windows 11.


