
Microsoft Defender, formerly known as Windows Defender, is a built-in antivirus and anti-malware solution that comes pre-installed with Windows operating systems. While it provides essential protection against various threats, there may be situations where you need to temporarily disable it, such as when using third-party security software or troubleshooting compatibility issues. In this article, we will guide you through the steps to disable Microsoft Defender in Windows 11.
Note: Disabling Microsoft Defender will leave your system vulnerable to potential security threats. It is recommended to disable it only temporarily and enable it again once the required task is completed.
How to Turn Off Microsoft Defender in Windows 11
In Windows 11, Microsoft Defender is the built-in antivirus and security software. If you want to disable it temporarily or make certain adjustments, you can follow these steps:
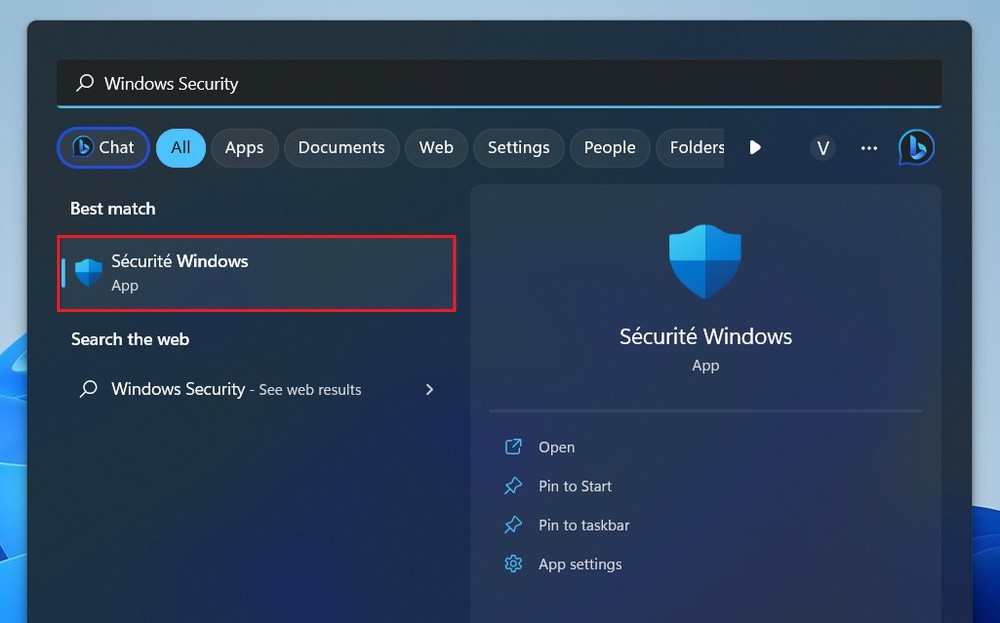
- Click on the Start button. Type “Windows Security” and open the Windows Security app from the search results.
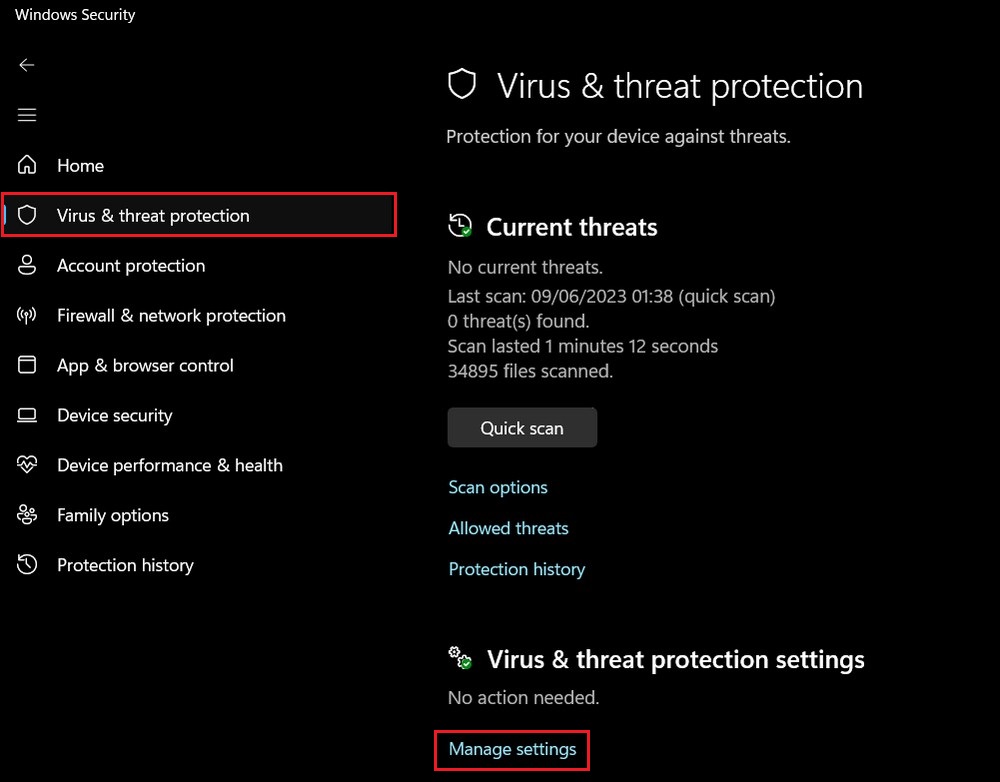
- Click on the Virus & threat protection option in the left sidebar.
- Under the “Virus & threat protection settings” section, click on Manage settings.
- Look for the Real-time protection toggle switch and click on it to turn it off. This will temporarily disable real-time scanning of files and programs.
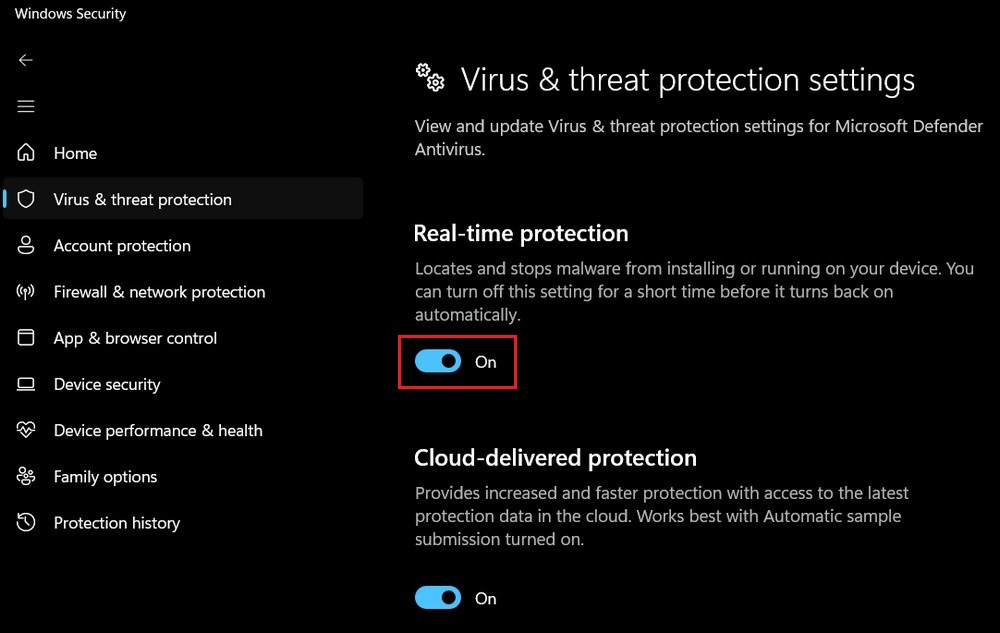
You might be prompted with a warning message asking if you want to continue. Click “Yes” to confirm the action.
Disable Microsoft Defender Using Group Policy Editor
Note: Group Policy Editor is not available in Windows 11 Home edition. This method is applicable for Windows 11 Pro, Enterprise, and Education editions.
To disable Microsoft Defender using Group Policy Editor, you can follow these steps:
- Press the Windows key + R on your keyboard to open the Run dialog box.
- Type gpedit.msc and press Enter.

- In the Group Policy Editor window, navigate to the following location: Computer Configuration > Administrative Templates > Windows Components > Windows Defender Antivirus.
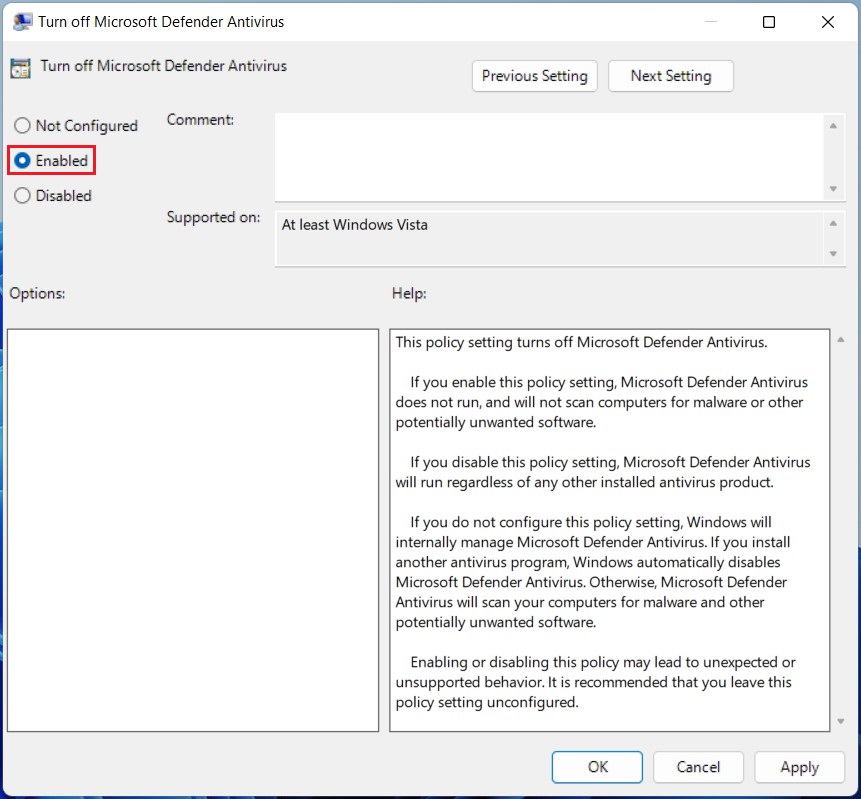
- On the right-hand side, locate the policy named “Turn off Windows Defender Antivirus” and double-click on it.
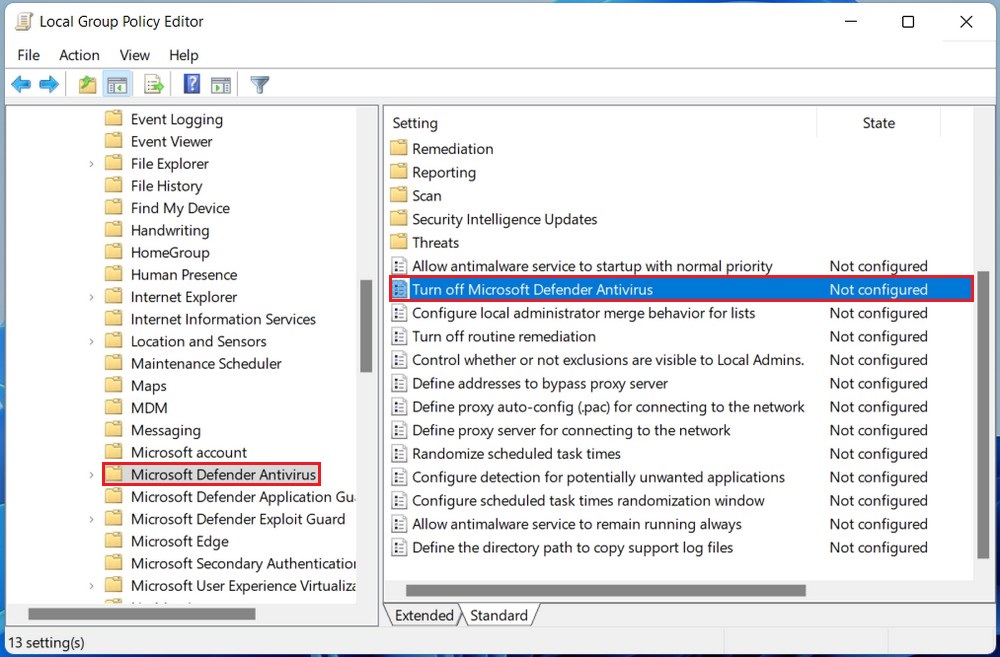
- In the policy settings window, select the Enabled option.
- Click Apply and then OK to save the changes.
- Restart your computer for the changes to take effect.
After following these steps, Windows Defender will be disabled on your computer.
Disable Microsoft Defender Using CMD
To disable Microsoft Defender in Windows 11 using the Command Prompt (CMD), you can follow these steps:
- Open the Start Menu and type “Command Prompt” in the search bar.
Right-click on Command Prompt in the search results. From the context menu, select Run as administrator. - In the Command Prompt window, type the following command and press Enter:
reg add "HKEY_LOCAL_MACHINE\SOFTWARE\Policies\Microsoft\Microsoft Defender" /v DisableAntiSpyware /t REG_DWORD /d 1 /f
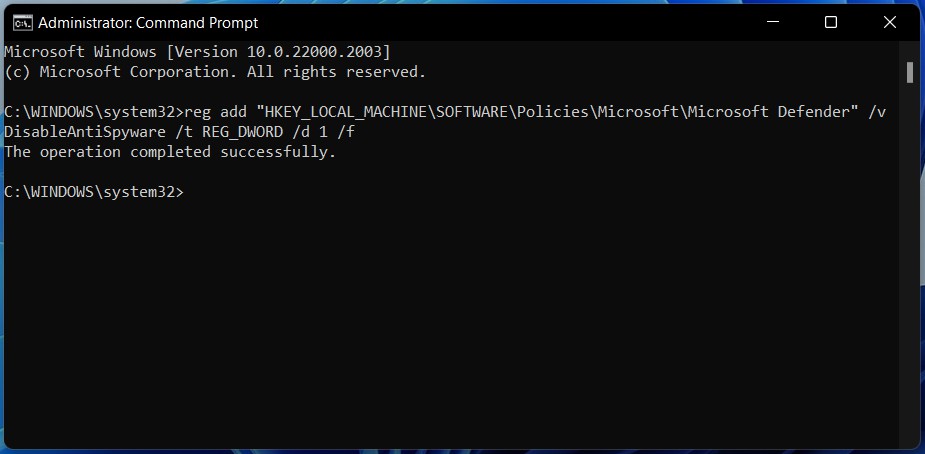
After executing the command, Microsoft Defender will be disabled on your system. Restart your computer for the changes to take effect.
How to Enable Microsoft Defender on Windows 11
To re-enable Microsoft Defender and restore its protection features, follow the steps mentioned above, and in the respective methods, turn on the Real-time protection toggle switch or select the “Disabled” option in the “Turn off Microsoft Defender Antivirus” policy setting.
Read more: Best Free Antivirus Software
Disabling Microsoft Defender in Windows 11 can be useful in certain scenarios, but it is important to remember that doing so can leave your system vulnerable to threats. If you choose to disable Microsoft Defender temporarily, make sure to re-enable it promptly after completing the necessary tasks. Stay vigilant and consider using alternative security measures if you decide to disable Microsoft Defender for an extended period.


