
Audio settings on Windows 11 are essential for a seamless multimedia experience. However, there may be times when your audio settings become misconfigured or you encounter issues with sound output. In such cases, resetting the audio settings can often resolve these problems. In this article, we’ll show you how to reset audio settings on Windows 11, allowing you to restore default configurations and potentially fix any audio-related issues you may be facing.
QUICK ANSWER
To reset audio settings on Windows 11, open Settings > System > Sound > Volume Mixer, and click “Reset” allowing you to restore default configurations and potentially fix any audio-related issues you may be facing.
How to reset sound settings on Windows 11
To reset audio settings on Windows 11, you can follow these steps:
- Open the Settings app.
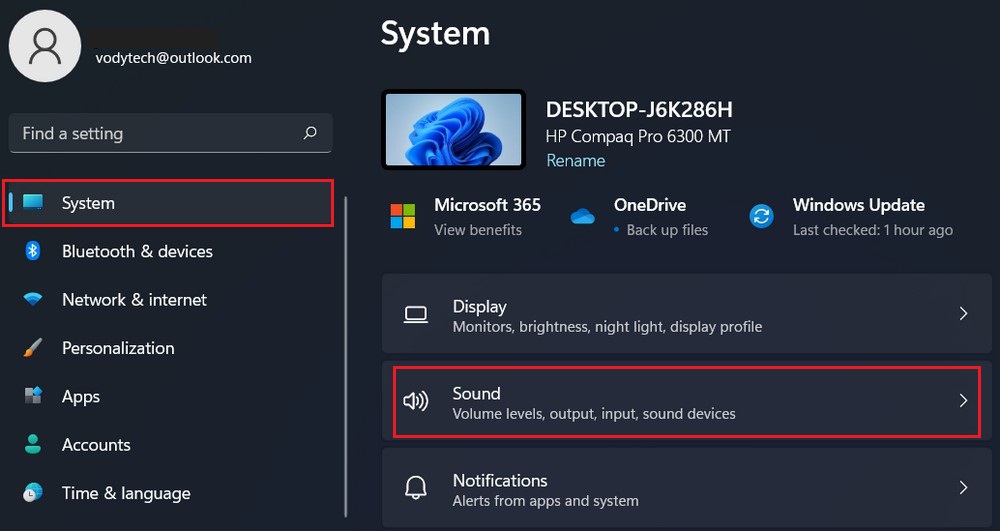
- In the Settings window, click on the System category.
- On the left sidebar, select the Sound option.
- In the Sound settings, scroll down to the “Advanced” section and click on the Volume mixer option.

- Click on the Reset button.
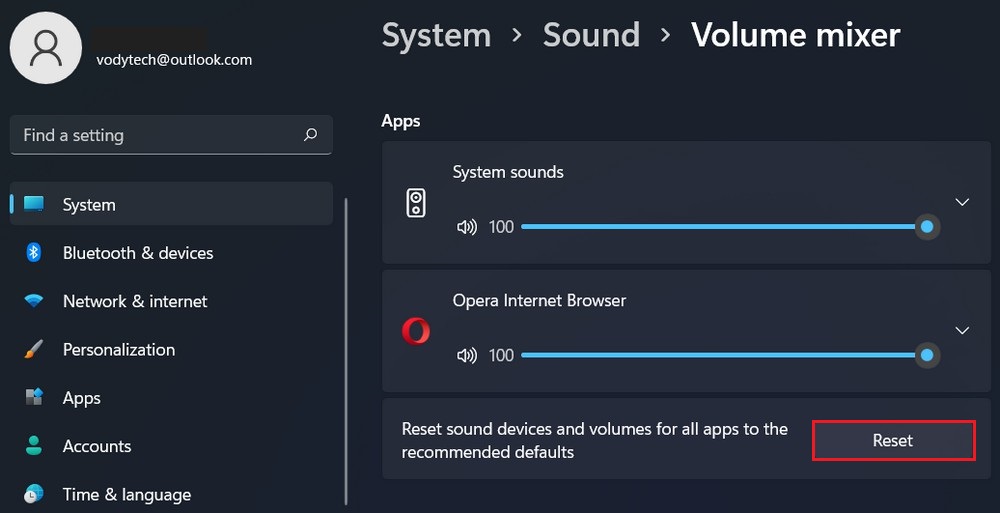
After following these steps, the audio settings for the selected devices will be reset to their default values. Keep in mind that any custom settings or adjustments you made previously will be lost.
Reset advanced audio settings
To reset advanced audio settings on Windows 11, you can follow these steps:
- Open Settings, you can press the Windows key + I to directly open the Settings app.
- In the Settings window, click on the System category.
- On the left sidebar, select Sound.
- Scroll down to the “Advanced” section and click on the More sound settings option. This will open the Sound Control Panel in a new window.

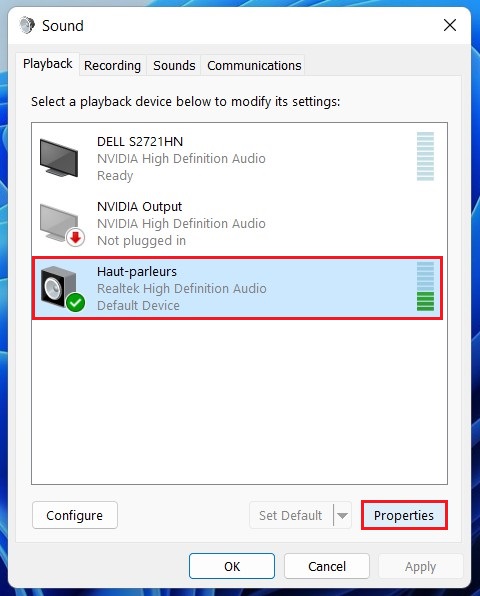
- In the Sound Control Panel, navigate to the Playback tab. This tab displays a list of audio output devices available on your system.
- Select the audio output device you want to reset and click on the Properties button located at the bottom right of the window.
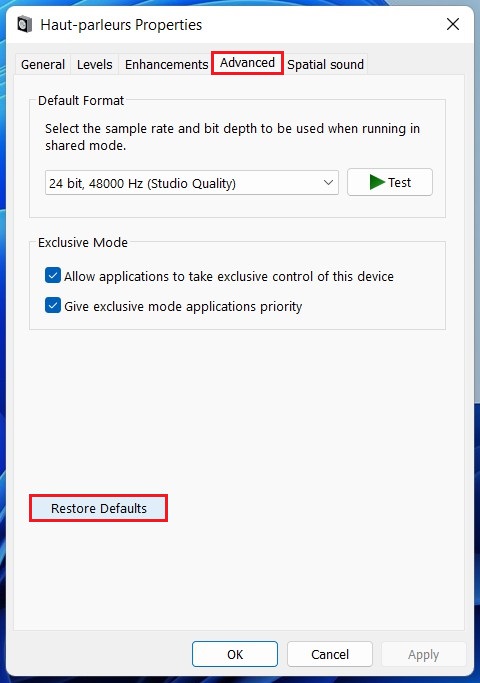
- In the Properties window, go to the Advanced tab.
- Under the Advanced tab, click on the Restore Defaults button.
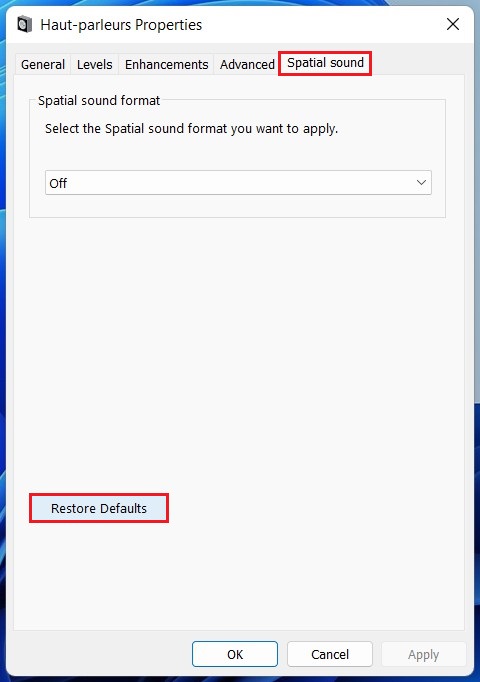
- Click the Spatial sound tab.
- Click the Restore Defaults button.
By following these steps, you should be able to reset the advanced audio settings on Windows 11.
Reset audio driver settings
To reset the audio driver on Windows 11, you can follow these steps:
- Open the Start menu by clicking on the Windows icon in the taskbar.
- Type “Device Manager” and click on the Device Manager app from the search results.
- In the Device Manager window, locate and expand the “Sound, video, and game controllers” category.
- Right-click on the audio driver that you want to reset.
- From the context menu, select the Uninstall device option.

- A confirmation dialog may appear, asking if you want to uninstall the device driver. Click on Uninstall to proceed.
After the restart, check if the audio is working properly. If not, you may need to update the driver to the latest version.
Read more: How to Open the Volume Mixer in Windows 11
Resetting audio settings on Windows 11 can help resolve various audio-related issues and revert any configuration changes back to the default settings. By following the step-by-step instructions outlined in this article, you should be able to reset your audio settings and get your audio functioning optimally. Remember to restart your computer after resetting the audio settings to ensure the changes are applied.


