
Samsung Galaxy Note 20 is a very capable smartphone that comes with tons of great features and a very powerful configuration, which makes it a powerhouse device. However, being a flagship device doesn’t mean that it can’t experience problems. So, if you are experiencing performance issues on your Galaxy Note 20, the Cache could be the culprit here. In this Vodytech guide, you will learn how to wipe cache partition on Samsung Galaxy Note 20.
What is Cache?
Before we get to the process, it’s important that you have a basic understanding of Cache. A cache is temporary data that apps use for their everyday function. The apps use the Cache to improve the user experience. In Cache, apps save temporary data like your login information, ad preferences, and other temporary data.
What is Cache Partition?
Apps need to access the Cache instantly. That’s why smartphones come with dedicated space in the memory for Cache, which is known as cache partition. In the Cache partition, the apps keep their cache data, and they access the data when they need it.
Why it’s important to wipe the cache partition?
Normally Cache doesn’t cause any major issue, but over time, the partition gets filled with Cache of many apps, and it starts messing up the performance of the device. In this scenario, wiping the cache partition result in a performance boost.
How to Wipe Cache Partition on Samsung Galaxy Note 20?
Now that you know why it’s important to wipe the cache partition, let’s get to the process of wiping the cache partition on Galaxy Note 20.
- The first step is to shut down your device. Just press the volume down key and power key at the same time. The power menu will appear on the screen. Tap the Power off option from the menu to turn off the device.
- Once your Note 20 gets off, press and hold the volume up key and power key at the same time. Keep holding them until the device vibrates and the Android Recovery Menu appears on the screen.
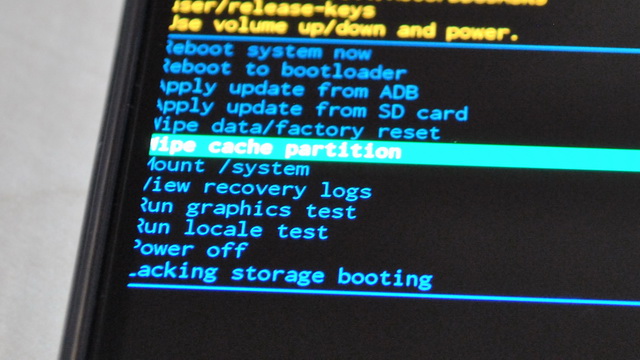
- In the Android Recovery menu, find the “Wipe cache partition” option.
- Use the volume down key to navigate the highlighter to the Wipe Cache partition section and use the power key to select it.
- On the next screen, you will be asked to confirm your action. Use the volume down key to highlight “Yes” and press the power key to confirm it.
- Once the process is completed, “Reboot System now” will be highlighted.
- Use the power key to confirm it.
- Let the system reboot. It can take several minutes to reboot the device.
- That’s it.
Congratulations! You have successfully wiped the cache partition on Samsung Galaxy Note 20.
Conclusion
That’s all, folks. In this guide, you learned how to wipe cache partition on Samsung Galaxy Note 20. If you have any questions, please let us know in the comments. Also, check this guide if you want to learn how to set custom ringtone on Samsung Galaxy Note 20.


