
Windows 11, the latest operating system from Microsoft, comes with a fresh and modern design. One aspect of the design that you might want to personalize is the system font. Changing the default system font can give your Windows 11 experience a unique touch and make it feel more personal. If you’re wondering how to change the default system font on Windows 11, follow the step-by-step guide below.
How to change default system font in Windows 11
Creating a REG file to change the default system font on Windows is an alternative method that allows you to quickly apply font changes without navigating through the settings. Here’s a step-by-step guide on how to create a REG file to change the default system font:
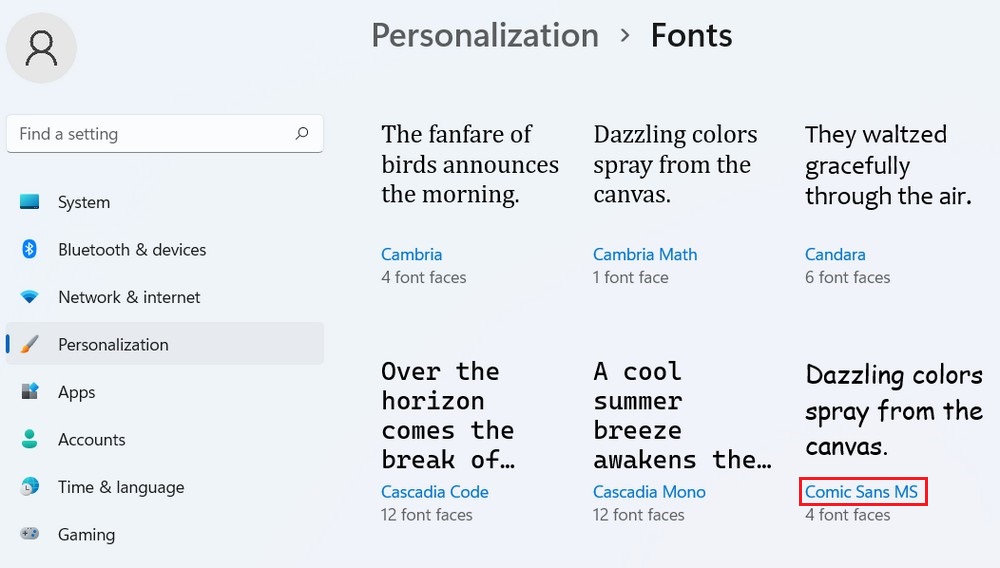
- Open Settings, and select Personalization > Fonts.
- Scroll through the list to find the font you want. In our example, we recorded Comic Sans MS.
- Open a text editor such as Notepad.
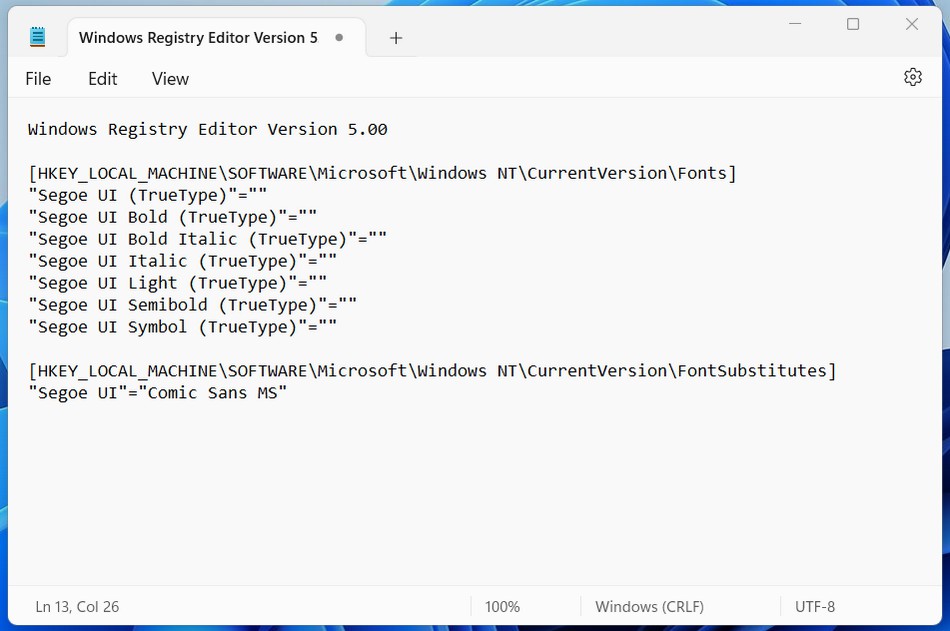
- Copy and paste the following content into the text editor:
Windows Registry Editor Version 5.00

[HKEY_LOCAL_MACHINE\SOFTWARE\Microsoft\Windows NT\CurrentVersion\Fonts]
"Segoe UI (TrueType)"=""
"Segoe UI Bold (TrueType)"=""
"Segoe UI Bold Italic (TrueType)"=""
"Segoe UI Italic (TrueType)"=""
"Segoe UI Light (TrueType)"=""
"Segoe UI Semibold (TrueType)"=""
"Segoe UI Symbol (TrueType)"=""

[HKEY_LOCAL_MACHINE\SOFTWARE\Microsoft\Windows NT\CurrentVersion\FontSubstitutes]
"Segoe UI"="YOUR_FONT_NAME"
- Replace “YOUR_FONT_NAME” with the name of the font you want to use as the default system font. Make sure the font name matches exactly as it appears in the Fonts folder of your Windows installation.
- This is what it looks like for our Comic Sans example:
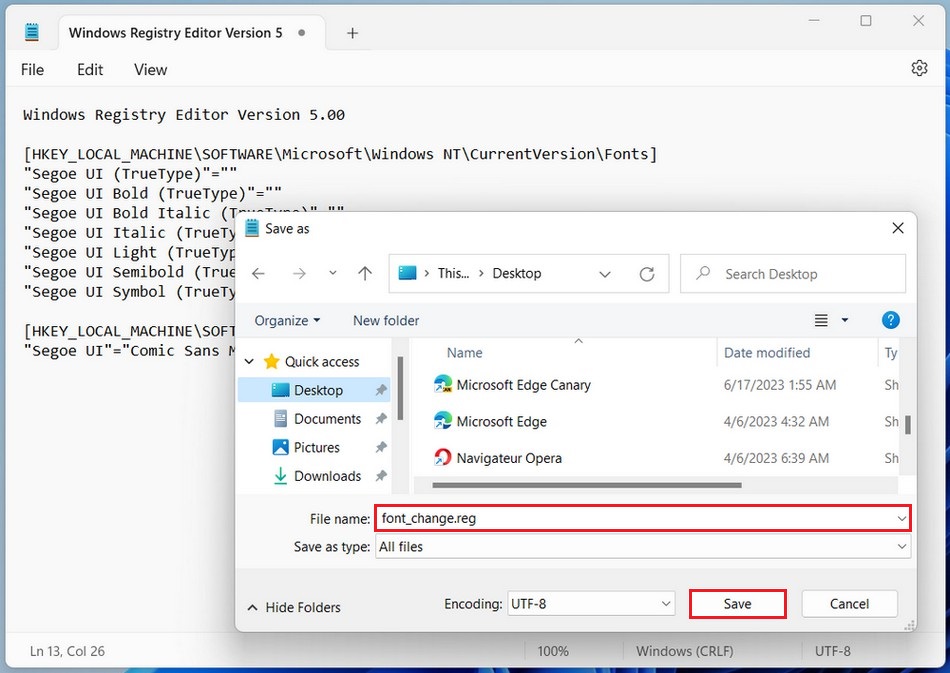
- Save the file with a
.regextension, for example, “font_change.reg”.
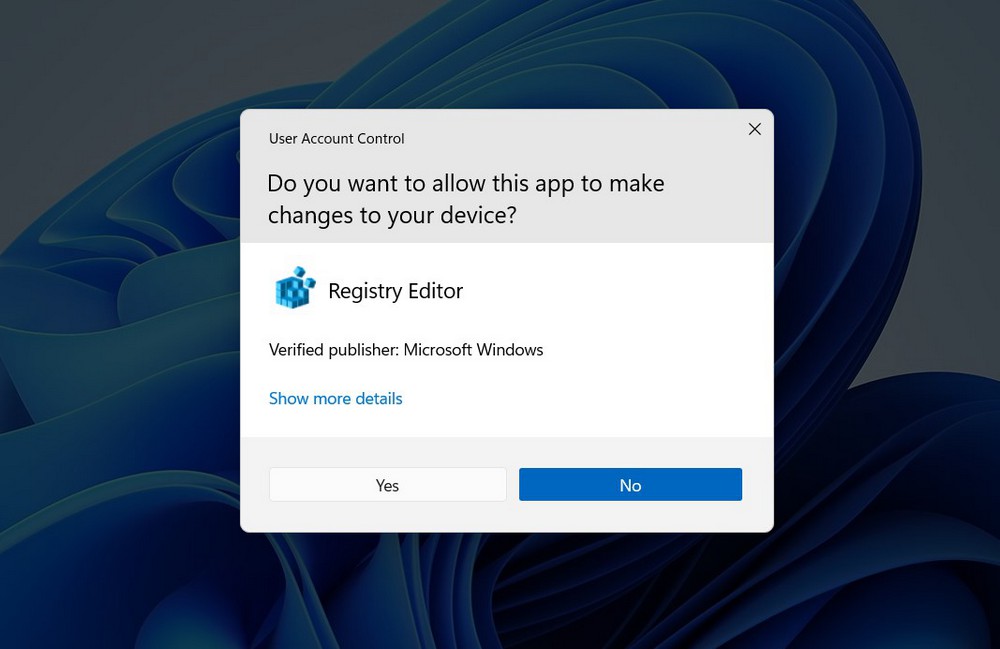
- Double-click the
.regfile to run it. You may receive a confirmation prompt asking if you want to make changes to the registry. Click Yes to proceed.
- You should see a confirmation message indicating that the changes have been successfully applied.
- Restart your computer to apply the new default system font.
Please note that modifying the Windows registry can have unintended consequences if done incorrectly. Ensure that you have a backup of your important data and consider creating a System Restore point before making any changes to the registry.
Read more: How to Install or Uninstall Fonts on Windows 11
Creating and running a REG file provides a quick and efficient way to change the default system font on Windows. By following the steps outlined above, you can easily create a REG file that modifies the necessary registry entries and apply the font changes seamlessly. Remember to choose the font name correctly and restart your computer for the changes to take effect.


