
Windows 11 is the latest version of Microsoft’s operating system, which has received many new features and improvements. One of the essential things that users may want to do after installing Windows 11 is to change the system language. The default language may not be the language that the user is comfortable with or may be the incorrect language for their region. In this article, we will discuss how to change the system language on Windows 11.
How to Change System Language on Windows 11
1. To change the system language on Windows 11, you need to open the Settings app. You can do this by clicking on the Start button on the taskbar, then clicking on the gear icon, which represents the Settings app. Alternatively, you can press the Windows key + I keyboard shortcut to open the Settings app directly.
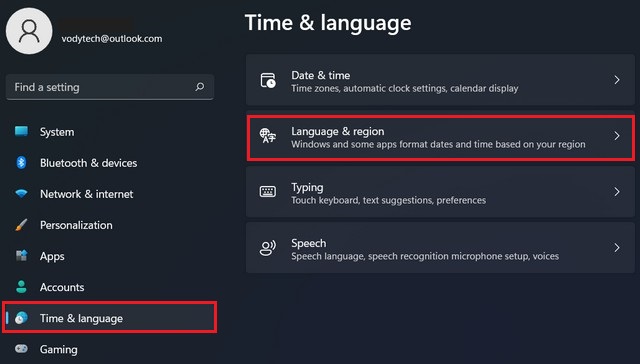
2. In the Settings app, click on the Time & Language option from the left-hand menu. This will open the Time & Language settings page.
3. On the Time & Language settings page, click on the Language & region option from the left-hand menu. This will show you the current language that your Windows 11 system is using.
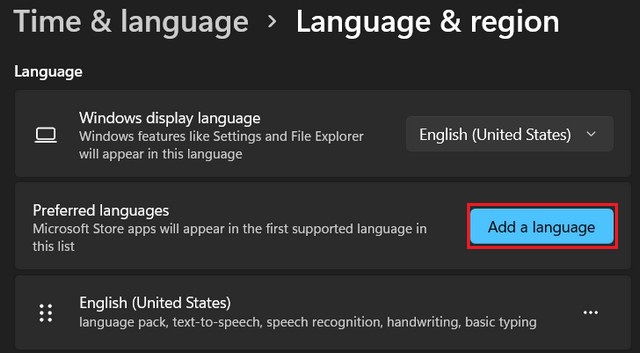
4. To add a new language, click on the Add a language button. This will open a list of available languages that you can choose from. You can search for a language by typing its name in the search box, or you can scroll down the list to find the language you want to add.
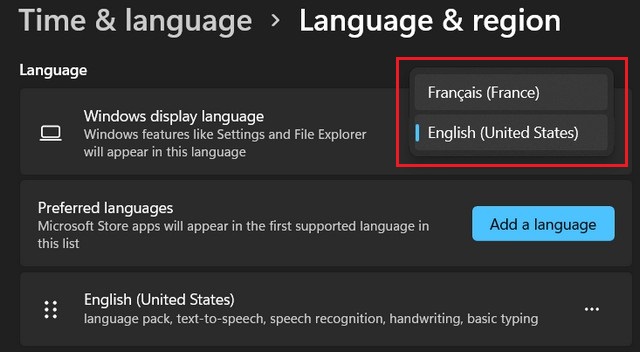
5. Once you have added the new language, you need to set it as the default language for your Windows 11 system. To do this, choose a language from the Windows display language menu.
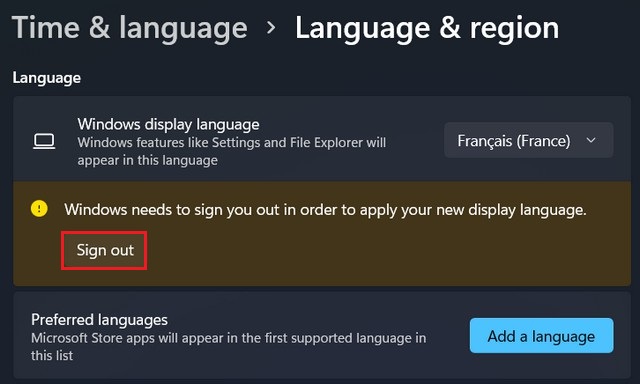
6. After you have set the new language as the default, you will be prompted to restart your computer. This is necessary for the changes to take effect. Click on the Sign out button to restart your computer.
7. Once your computer has restarted, log in to your account and check that the language has been changed. You can do this by going back to the “Language” settings page and checking that the new language is now the default language.
Conclusion
changing the system language on Windows 11 is a straightforward process. By following the steps outlined above, you can easily add a new language and set it as the default language for your Windows 11 system. This is a great way to personalize your experience and make your computer more accessible to you. If you have any questions or suggestions, please let us know in the comments section. Also, check this guide where you will learn how to change the date and time on Windows 11.


