
Windows 11 is the newest release by Microsoft, and the company claims that the new Windows 11 is better than all the previous versions in terms of performance and User Interface. The company has also changed the things in the system, which might make it difficult for new users to find settings. If you are also one of the early adopters and need help with changing the Date and Time, we can help. In this Vodytech Guide, you will learn how to change the date and time on Windows 11. Let’s get started.
RELATED: How to Uninstall an Application on Windows 11
How to Change the Date and Time on Windows 11 via Settings
Let’s start with our first method, which you can use to change the date and time on Windows. In this method, you will be using the Settings App. Here’s how you can do it.
- Go to your Windows.
- Click on Windows Icon and then click on the gear icon to open the Settings App. Alternatively, press Windows + I to open the Settings App.
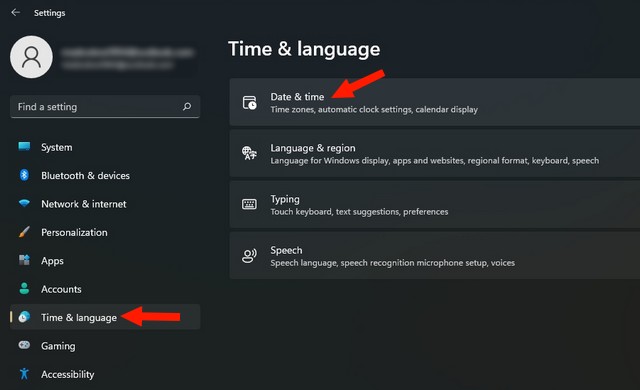
- In the settings, go to Time and Language Section.
- Now click on the Date & time section.
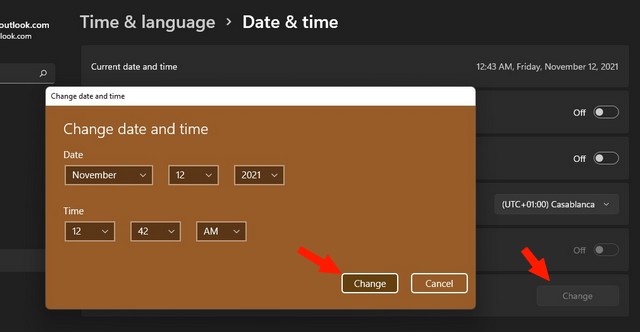
- Here make sure that you disable Set Time Automatically.
- Now find the Change button and click it.
- Here you can change the time and date and click Change to confirm it.
How to Change the Date and Time on Windows 11 via Control Panel
Control Panel is the App that was also available on previous versions of Windows, and it’s also available on Windows 11. You can use it to change the date and time on Windows. Here’s how you can do it.
- Go to your Windows PC and click on the search bar.
- Type CPL or Control Panel on the search bar to open the Control Panel.
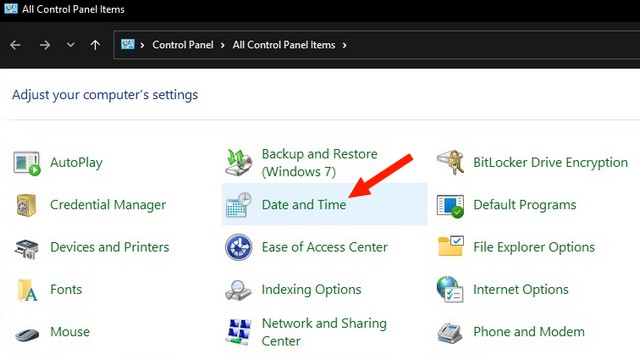
- Once the Control Panel is open, find the Date and Time section and click it.
- On the next screen, A pop-up Window will appear; click on change date and time.
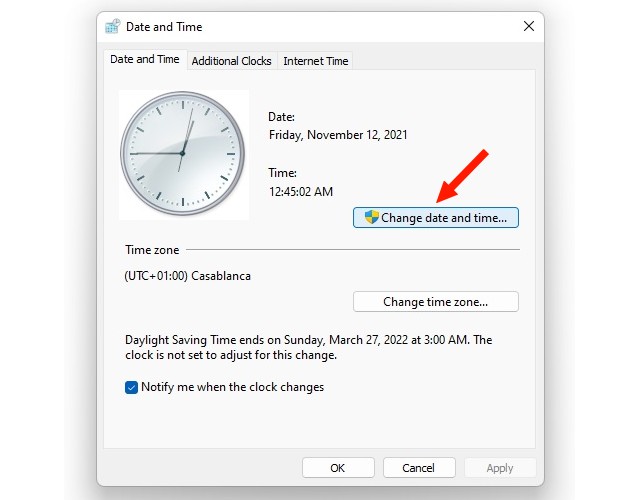
- Click on Change Calendar Settings.
- Now you can easily change the date and time and once you are done, click OK to confirm it.
How to Change the Date and Time on Windows 11 via Windows PowerShell
Windows PowerShell is another tool that you can use to change the date and time on Windows 11. Here’s how you can use it.
- Go to the Windows Search bar and type Windows PowerShell.
- Now open it and make sure that you run it as Administrator.
- Once the PowerShell is open, use this format “Set-Date -Date “dd/mm/yyyy HM:MM AM or PM”. For example, if you want to set 10 November Date and time 10:00 PM, you will type this” 10/11/2022 10:00 PM.
- Press Enter.
Conclusion
That’s all folks. In this guide, we shared the 3 methods which you can use to change the date and time on Windows 11. If you have any questions, please let us know in the comments. Also, check this guide where we shared the Best Password Managers for Windows.


