
Netflix is one of the most popular streaming platforms worldwide, offering a vast collection of movies, TV shows, documentaries, and more. Whether you’re watching on your computer, smart TV, or mobile device, Netflix allows you to adjust the video quality to suit your preferences and internet connection. In this article, we will guide you through the steps to change the video quality on Netflix.
QUICK ANSWER
To change the video quality on Netflix, click on your profile icon, and select Account > Playback settings > Change. Choose your video quality and click on the Save button.
Why Change Video Quality?
Changing the video quality on Netflix can be beneficial for several reasons. Here are a few:
- Internet Speed: If you have a slow or limited internet connection, lowering the video quality can prevent buffering issues and ensure smooth playback.
- Data Usage: Adjusting the video quality helps control your data consumption, especially if you have a limited data plan.
- Device Compatibility: Some devices may not support higher video quality settings. By adjusting the quality, you can ensure optimal playback on any device.
How to Change Video Quality on Netflix
To change the video quality on Netflix, follow these steps:
- Launch Netflix and sign in to your account.
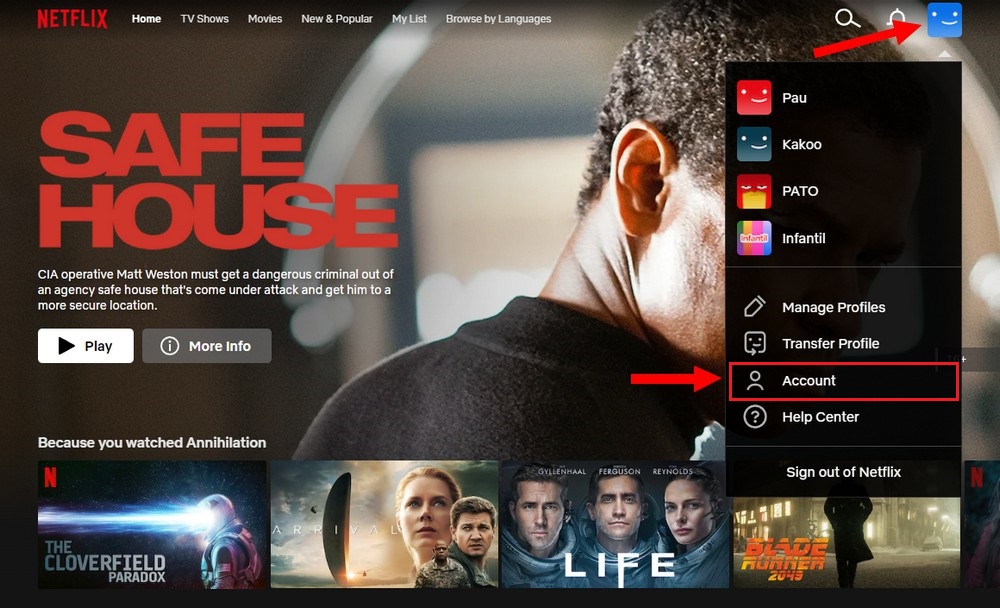
- Click on your profile icon located in the top-right corner. From the dropdown menu, select Account to access your account settings.
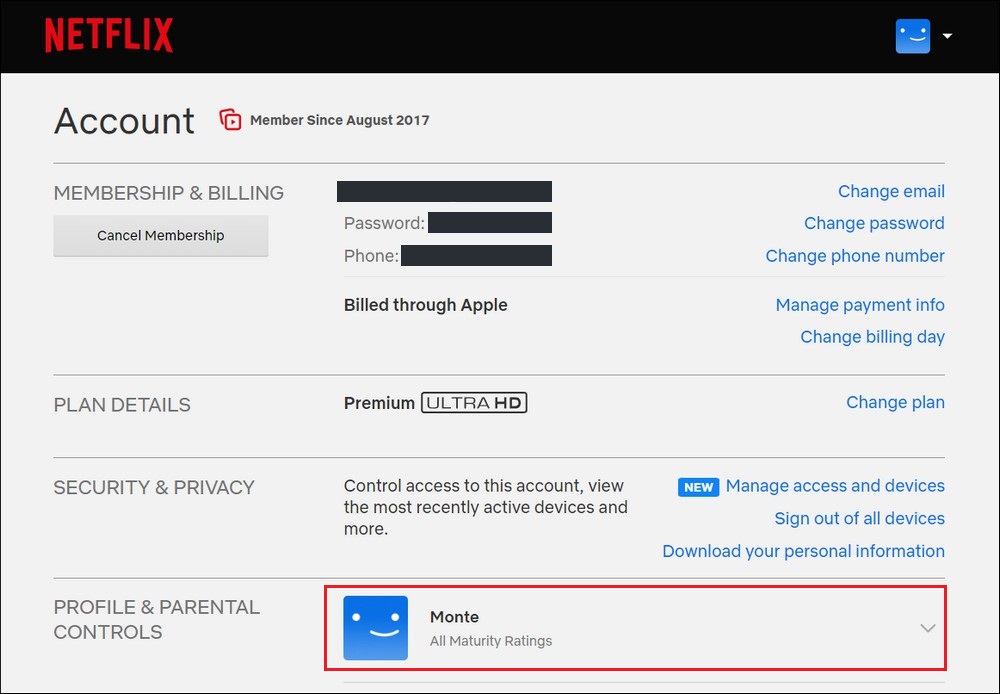
- Scroll down to the “Profile & Parental Controls” section. Click on the profile for which you want to change the video quality.
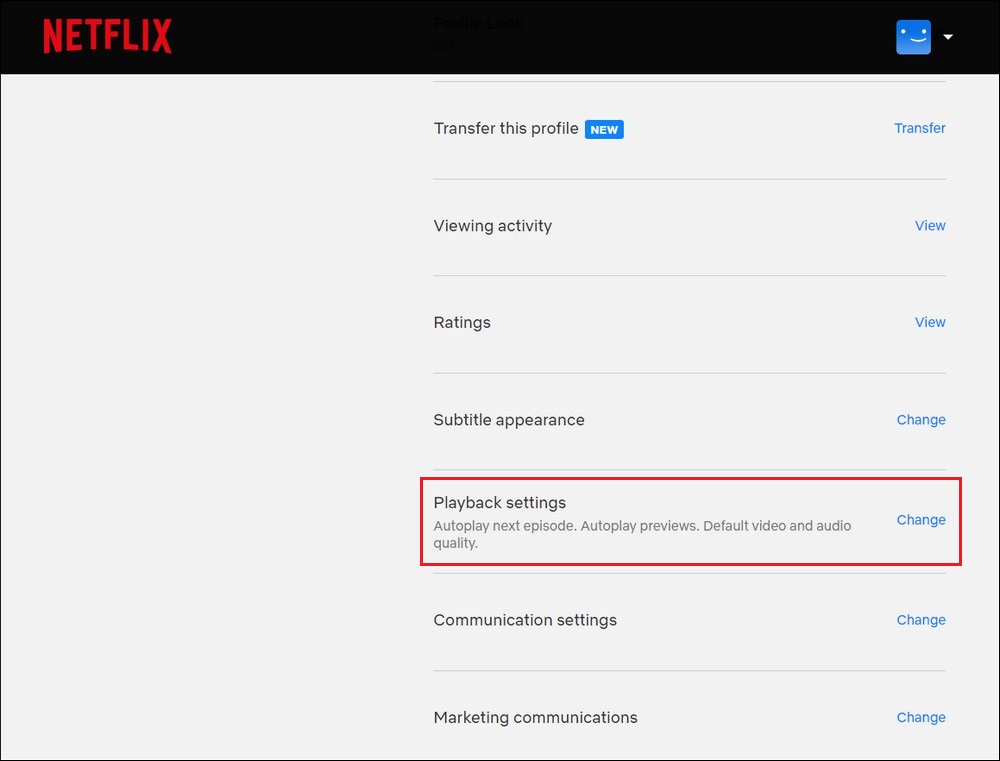
- On the profile page, locate the Playback settings option. Click on the Change button next to it.
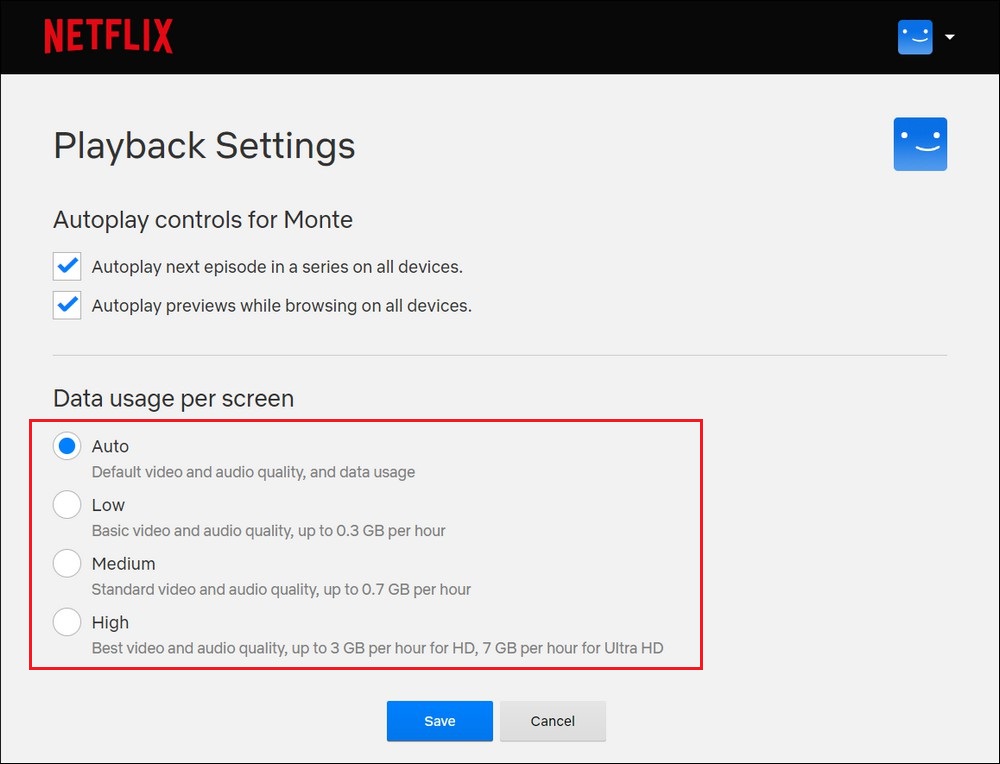
- Netflix offers different video quality options based on your device and subscription plan. Select the video quality that suits your preference or data usage requirements.
-
- Auto: This setting allows Netflix to automatically adjust the video quality based on your internet connection and device capabilities.
- Low: This option provides the lowest video quality and uses less data.
- Medium: This setting offers better video quality while still minimizing data usage.
- High: This option provides the best video quality but uses more data. It’s recommended for high-speed internet connections or if you have an unlimited data plan.
- After selecting the desired video quality, click on the Save button to apply the changes to your profile.
Note: Keep in mind that changing the video quality settings on Netflix affects all devices using that particular profile. If you want to customize the video quality for individual devices, you may need to adjust the playback settings on each device separately.
Read more: How to Download Netflix Movies on Laptop & PC
By adjusting the video quality settings on Netflix, you can enhance your streaming experience and customize it according to your preferences and requirements. Whether you’re watching on a large screen or a mobile device, optimizing the video quality will allow you to enjoy your favorite movies and shows without interruptions.

