 on Windows 11")
If you’re a PC gamer or use your computer for graphic-intensive tasks like video editing or 3D rendering, having a dedicated graphics card (GPU) is essential. However, sometimes you may need to check which graphics card you have installed on your computer. Here’s how to check your graphics card on Windows 11.
What is a Graphics Card?
A Graphics Card, also known as a Video Card or GPU (Graphics Processing Unit), is a hardware component designed to process and render graphics and images on a computer. It is responsible for handling the graphical processing tasks that would otherwise burden the computer’s central processing unit (CPU).
The Graphics Card has its own memory (VRAM) and processor, allowing it to perform complex calculations necessary for rendering graphics, displaying high-quality images and videos, and running demanding graphical applications like video games, graphic design software, and 3D modeling programs.
The Graphics Card connects to the computer’s motherboard via a PCI Express slot and outputs the rendered graphics to the display through various ports such as HDMI, DisplayPort, and VGA. The performance of a Graphics Card is determined by factors such as the number of cores, clock speed, memory bandwidth, and the amount of VRAM.
Learn how to easily check your graphics card (GPU) on Windows 11 using different methods such as Windows Settings, Device Manager, System Information, Task Manager, DirectX Diagnostic Tool, and Command Prompt.
Check Your Graphics Card on Windows 11 From Windows Settings
Checking your graphics card on Windows 11 is possible from the Windows Settings. Here’s how you can do it:
1. Click on the Start button and select the Settings icon (gear icon).
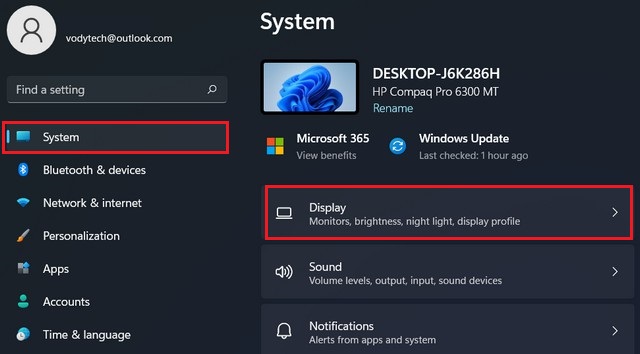
2. In the Settings window, click on the System option.
3. In the left-hand menu, click on the Display option.
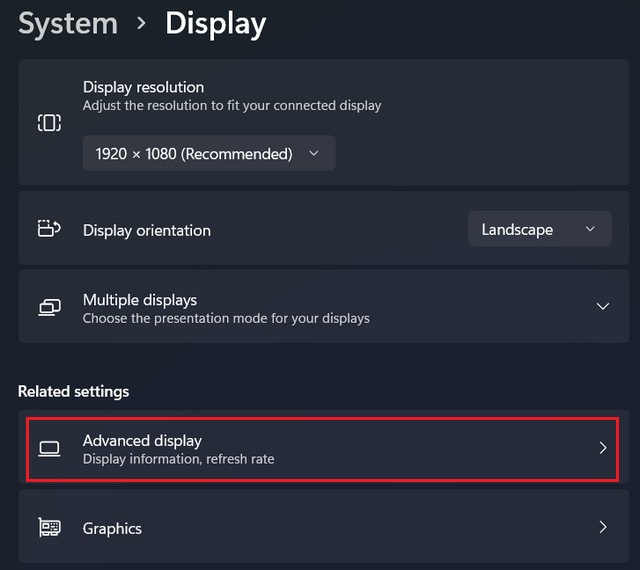
4. Scroll down and click on the Advanced display settings.
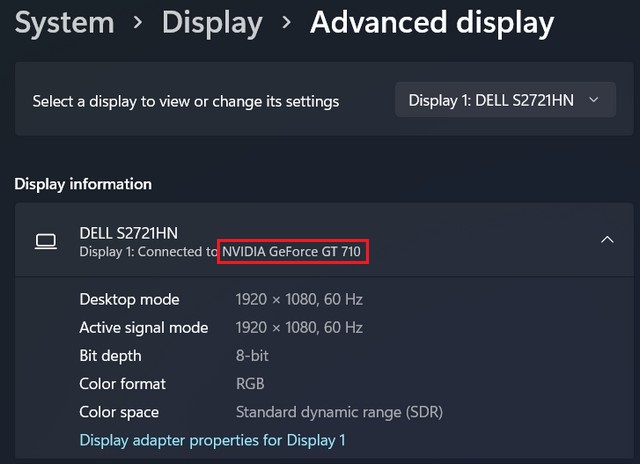
5. Under the “Display information” section, you should see the name of your graphics card listed.
Check Your GPU Card on Windows 11 From the Device Manager
Checking your GPU card on Windows 11 through the Device Manager is an easy way to find out what graphics card your system is using. Here’s how to do it:
1. Right-click on the Start button and select Device Manager from the context menu.
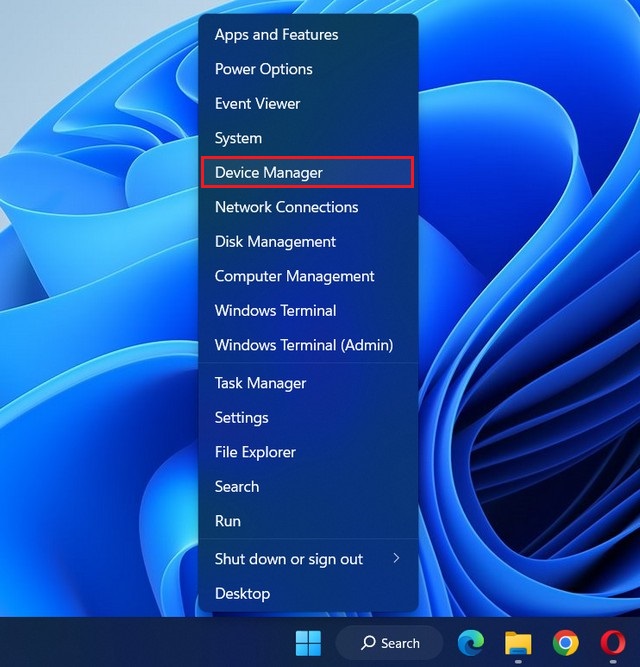
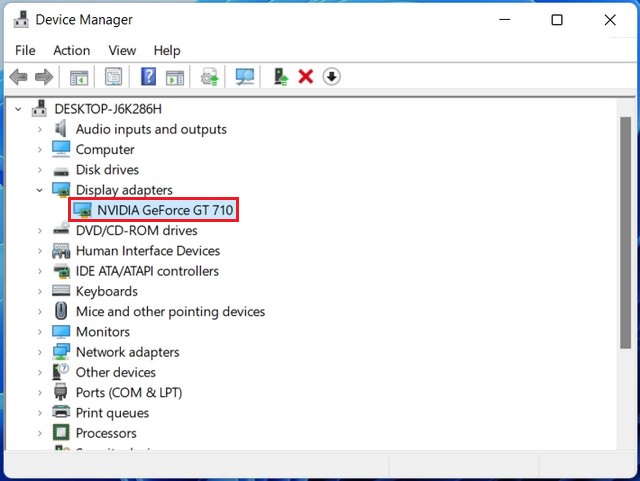
2. In the Device Manager window, click on the arrow next to the Display adapters category to expand it.
3. You should see the name of your graphics card listed. It will usually include the brand name and model number, such as “NVIDIA GeForce GT 710” or “AMD Radeon RX 6700 XT”.
That’s it! Checking your GPU card on Windows 11 through the Device Manager is a quick and easy way to find out what kind of graphics card your system is using.
Check Your Graphics Card on Windows 11 From the System Information
To check your graphics card on Windows 11 from the System Information utility. Here’s how to do it:
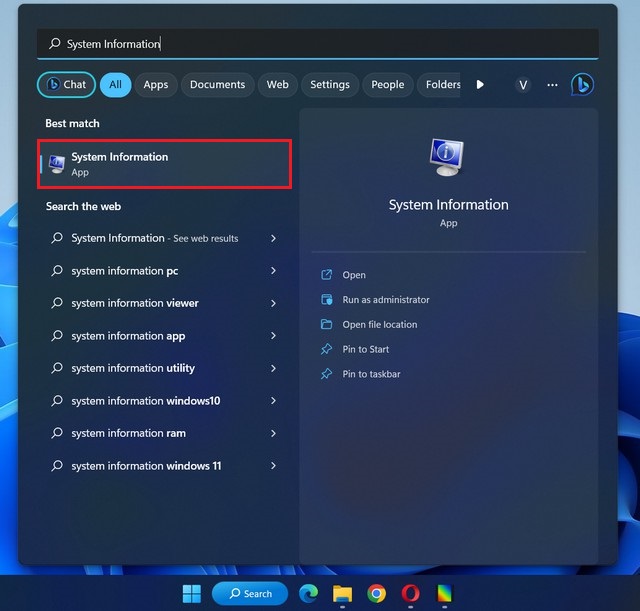
1. Click on the Start button and type “System Information” in the search box.
2. Click on the System Information app from the search results.
3. In the System Information window, expand the Components category and click on Display.
4. In the right-hand pane, you should see information about your graphics card, including its name and driver version.
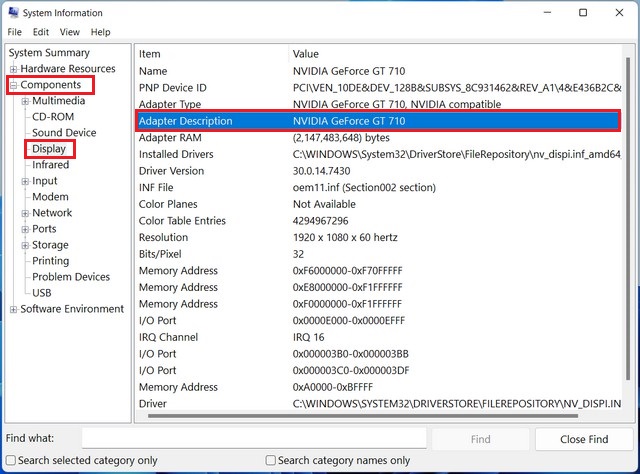
You can also find out how much video memory your graphics card has by looking at the “Adapter RAM” field.
Check Your Graphics Card on Windows 11 Using the Task Manager
You can also check your GPU on Windows 11 using the Task Manager. Here’s how to do it:
1. Right-click on the taskbar and select Task Manager from the context menu. Alternatively, you can press the Ctrl + Shift + Esc keys to open the Task Manager.

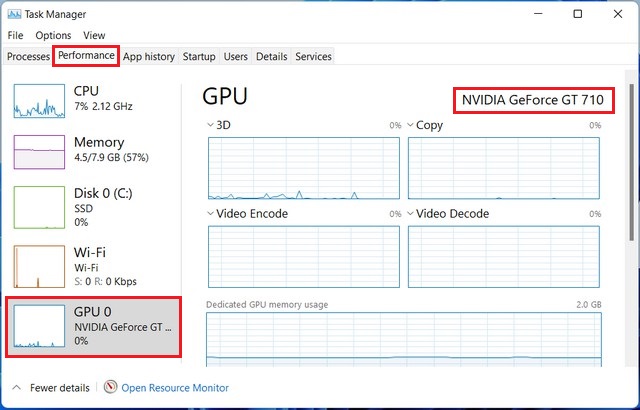
2. Click on the Performance tab in the Task Manager window.
3. Click on the GPU option in the left-hand menu.
4. In the right-hand pane, you should see information about your graphics card, including its name, dedicated GPU memory, and GPU utilization percentage.
You can also see a list of processes and applications currently using the GPU, which can be helpful for troubleshooting graphics-related issues.
That’s it! Checking your graphics card on Windows 11 using the Task Manager is a quick and easy way to find out what kind of graphics card your system is using and how much it is being utilized. This can be helpful for troubleshooting graphics-related issues or optimizing system performance.
Check Your Graphics Card on Windows 11 From DirectX Diagnostic Tool
To check your graphics card on Windows 11 from the DirectX Diagnostic Tool. Here’s how to do it:
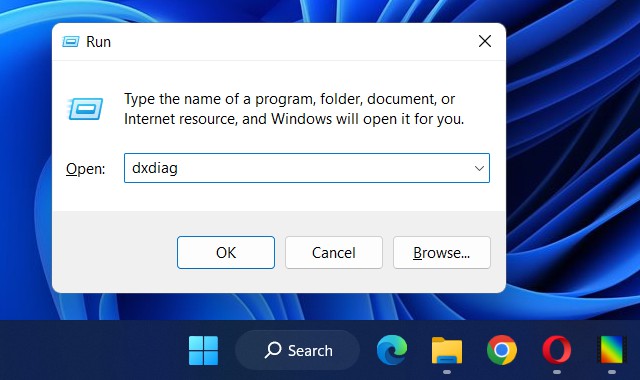
1. Press the Windows key + R to open the Run dialog box.
2. Type “dxdiag” in the Run box and hit Enter or click OK.
3. In the DirectX Diagnostic Tool window, click on the Display tab.
4. You should see information about your graphics card, including its name, manufacturer, chip type, and driver version.
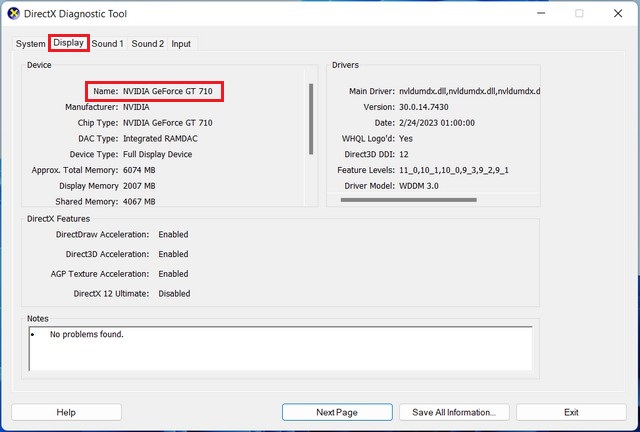
You can also find out how much video memory your graphics card has by looking at the “Approx. Total Memory” field.
That’s it! Checking your graphics card on Windows 11 using the DirectX Diagnostic Tool is a useful way to find out what kind of graphics card your system is using and how well it is performing.
Check Your Graphics Card on Windows 11 From Command Prompt
To check your graphics card on Windows 11 from the Command Prompt. Here’s how to do it:
1. Open the Command Prompt by pressing the Windows key + X and selecting “Windows Terminal (Admin)” or “Command Prompt (Admin)” from the menu.
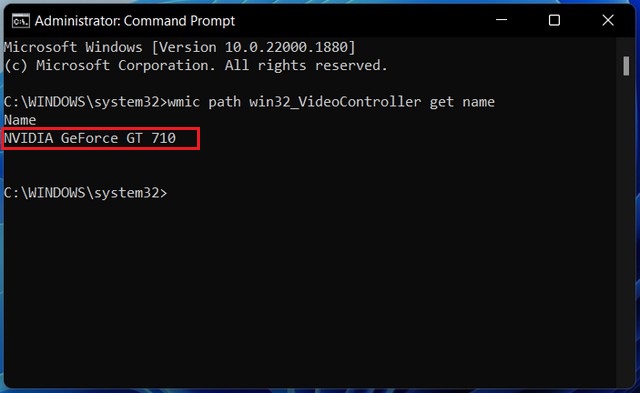
2. Type wmic path win32_VideoController get name and hit Enter.
3. You should see the name of your graphics card listed in the output. It will usually include the brand name and model number, such as “NVIDIA GeForce GT 710”.
If you have more than one graphics card installed on your system, each one will be listed separately in the output.
Read more: How to Check Video RAM (VRAM) in Windows 11 PC
Knowing what kind of graphics card you have installed on your Windows 11 computer can be very useful, especially if you’re a gamer or use graphics-intensive applications. By following the methods outlined in this article, you can easily check your graphics card and ensure that it meets the requirements of the games or software you want to use.


