 in Windows 11 PC")
Video RAM (VRAM) is a type of memory that is used by your computer’s graphics card to store data such as textures, graphics, and other video-related information. The amount of VRAM your system has will determine the performance of your computer when running games or other applications that require high-quality graphics. In this article, we’ll show you how to check the VRAM on Windows 11 so that you can make sure your computer has enough resources to handle your needs.
How to check VRAM on Windows 11
If you’re using Windows 11 and want to check the amount of VRAM your graphics card has, there are a few ways to do so. In this article, we’ll show you how to check VRAM in Windows 11.
How to check VRAM in Windows 11 using Windows settings
To check Video RAM (VRAM) in Windows 11 using Windows settings, follow these steps:
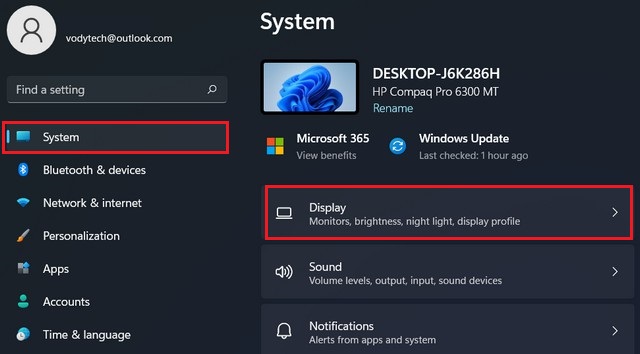
Click on the Windows Start button in the taskbar or press the Windows key on your keyboard.
Click on the Settings icon (gear icon) in the Start menu. In the left pane of the System settings, click on the Display option.
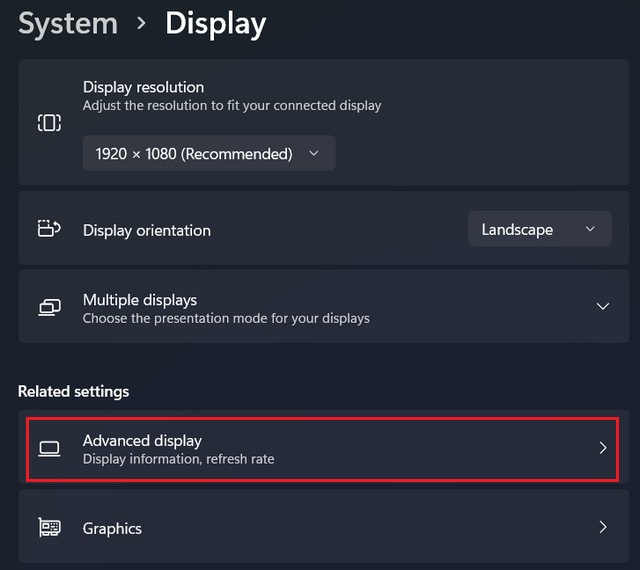
In the right pane, scroll down and click on the Advanced display settings.
Under the “Display information”, click on the Display adapter properties for Display 1 link.
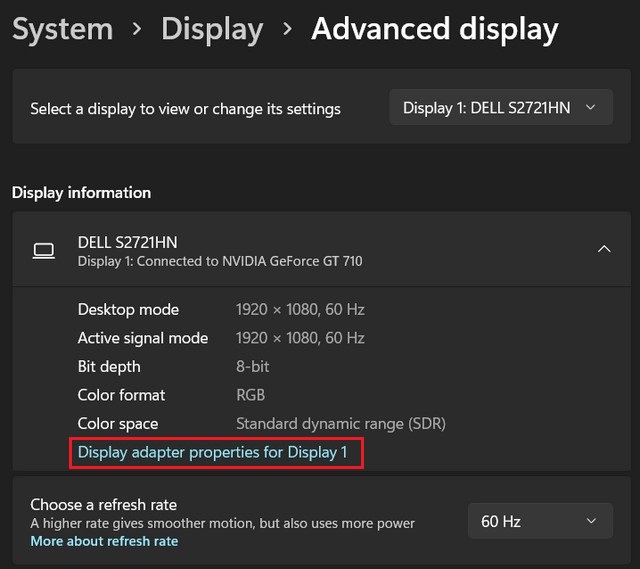
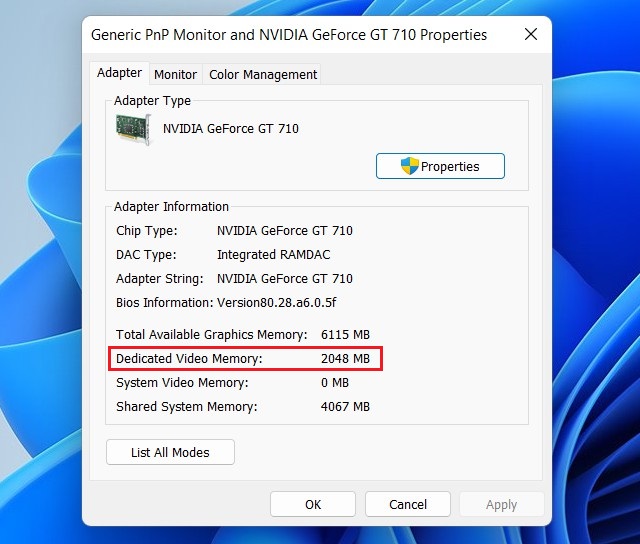
In the Display adapter properties window, you can find the Total available graphics memory and Dedicated video memory. The Dedicated video memory is your VRAM.
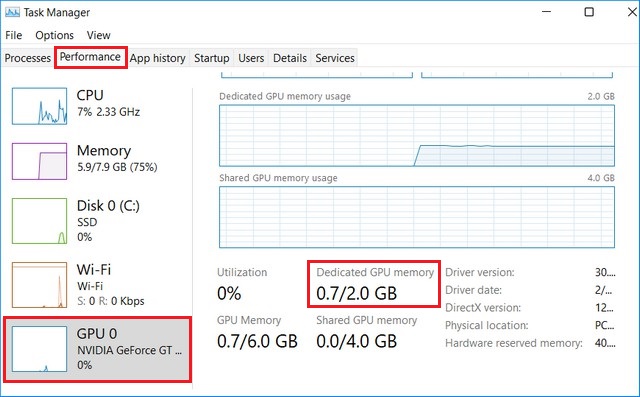
Check Video RAM (VRAM) using Task Manager
The easiest way to check VRAM in Windows 11 is by using the Task Manager. Here’s how to do it:
Press the Ctrl + Shift + Esc keys on your keyboard to open the Task Manager.
Click on the Performance tab.
Click on GPU in the left-hand menu.
Under “Dedicated GPU Memory” you will see the amount of VRAM your graphics card has.
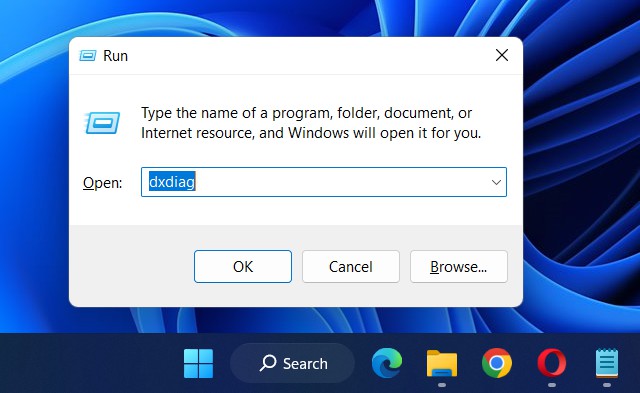
Using DirectX Diagnostic Tool
Another way to check VRAM in Windows 11 is by using the DirectX Diagnostic Tool. Here’s how to do it:
Press the Windows key + R on your keyboard to open the Run dialog box.
Type in “dxdiag” and press Enter.
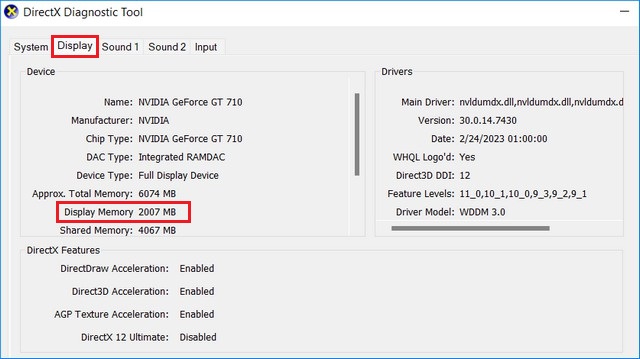
Click on the Display tab.
Under “Device” you will see the name of your graphics card. Under Display Memory you will see the amount of VRAM your graphics card has.
Use third-party software
If you prefer a more user-friendly interface, you can use third-party software to check your VRAM. There are many free tools available online that can display detailed information about your graphics card, including the amount of VRAM it has.
One such tool is GPU-Z, which is a lightweight and easy-to-use utility that provides real-time information about your graphics card’s performance, including its VRAM. After installing GPU-Z, simply launch the application and look for the Memory Size value under the Graphics Card tab.
Another popular option is MSI Afterburner, which is a comprehensive tool for overclocking your graphics card. While it is primarily designed for tweaking your GPU’s performance, it also provides detailed information about your graphics card’s hardware, including the amount of VRAM available.
Read more: How to change display refresh rate on Windows 11
Checking VRAM in Windows 11 is a simple process that can help you ensure that your system has the necessary resources to handle intensive tasks like gaming and video editing. Whether you prefer using the built-in DirectX Diagnostic Tool or third-party software like GPU-Z or MSI Afterburner, there are many options available to help you monitor your system’s performance and ensure that it is running at its best.


