
Virtualization is a powerful feature that allows users to run multiple operating systems or create virtual machines on their computers. It enables the efficient allocation of hardware resources and facilitates testing, development, and running software in isolated environments. If you’re using Windows 11, enabling virtualization can open up a world of possibilities. In this article, we’ll show you how to enable Virtualization (VT) on Windows 11.
How to enable hardware Virtualization on Windows 11
To enable virtualization in the BIOS or UEFI settings, follow these general steps:
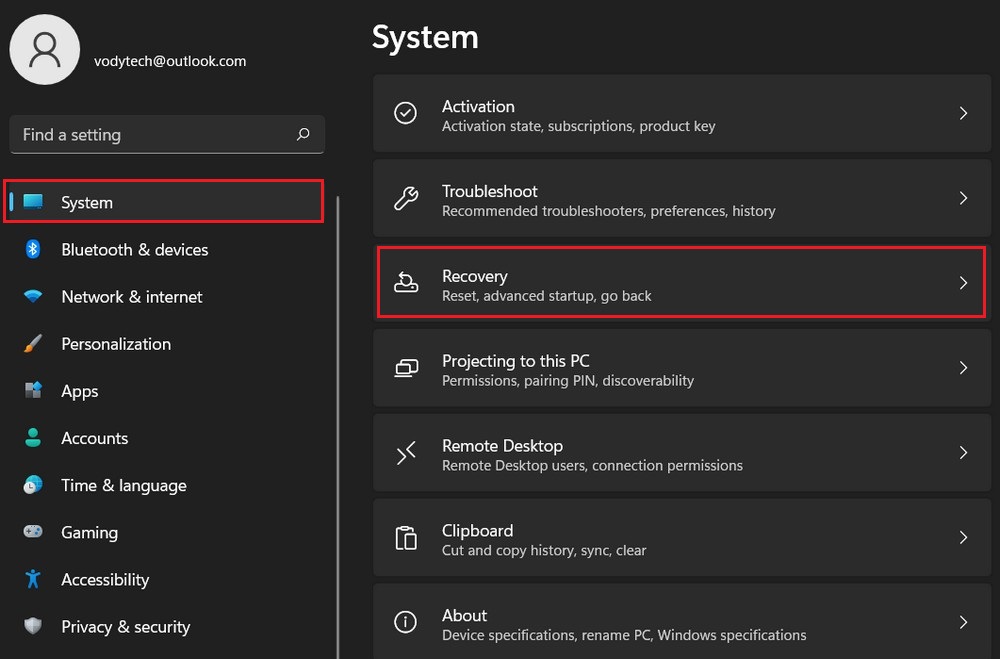
- Open the Settings of your Windows Computer.
- Now head to the System Section.
- Go to Recovery and now click on Restart now under Advanced Setup.
- Now go to Troubleshoot section and click Advanced options.
- Click on UEFI Firmware Settings and click Restart.
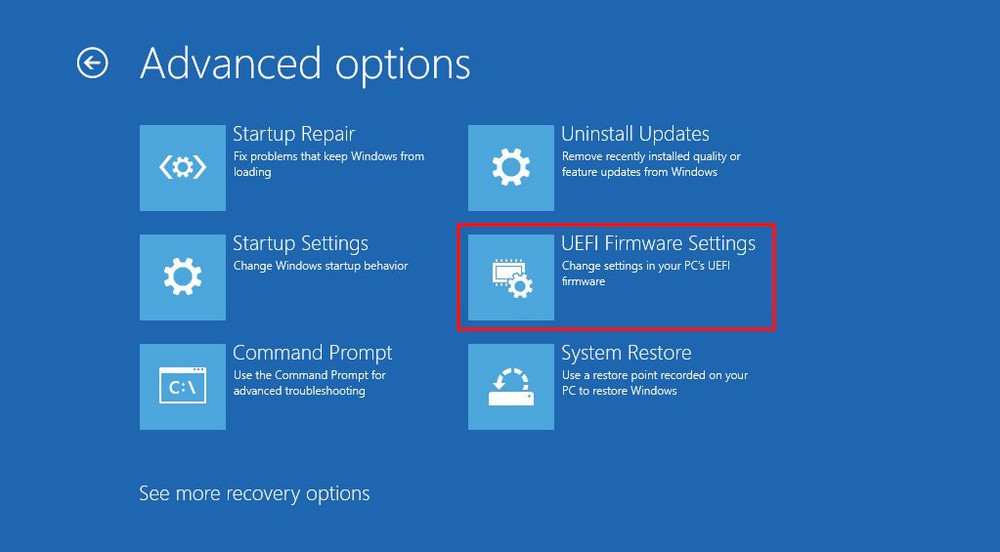
- Now find Advanced Menu, Security or Configuration.
- Find Virtualization and enable it.
Please note that the steps may differ slightly depending on your computer’s manufacturer and BIOS version. If you’re unsure about any settings or can’t find the virtualization options, consult your computer’s documentation or the manufacturer’s website for specific instructions.
Quick note: The feature may have the “Virtualization Technology,” “Intel Virtual Technology,” “Intel VT-x,” or “AMD-V,” mode,” but the name could be different on the motherboard.
It’s worth noting that not all computers support virtualization, so if you don’t find the virtualization option in your BIOS/UEFI settings, it may indicate that your hardware does not support it. Additionally, if you are using a virtualization software such as VMware Workstation or VirtualBox, make sure to check their settings as well to ensure that virtualization is enabled within the software.
How to enable software Virtualization on Windows 11
After enabling virtualization in your computer’s BIOS or UEFI settings, you need to ensure that it’s also enabled within the Windows operating system.
To enable virtualization on Windows 11, follow these steps:
- Press the Windows key + I to open the Settings app.
- Click on Apps from the available options.
- In the right side, select Optional features.
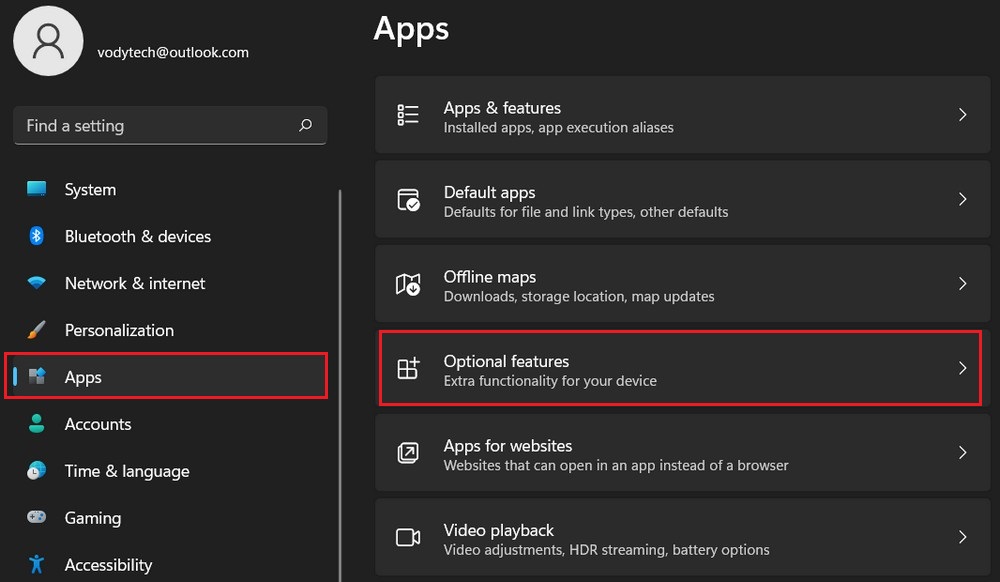
- Scroll down to the “Related settings” section and click on More Windows features.
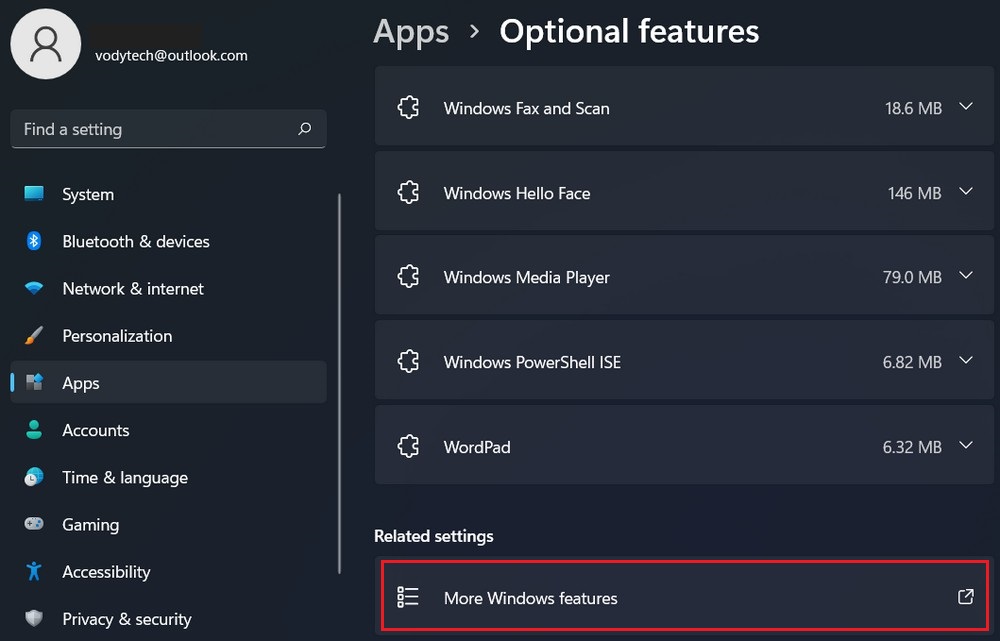
- The “Windows Features” dialog box will appear. Scroll down and check the box next to Hyper-V to enable it.
- Check the boxes next to Virtual Machine Platform and Windows Hypervisor Platform to enable them.
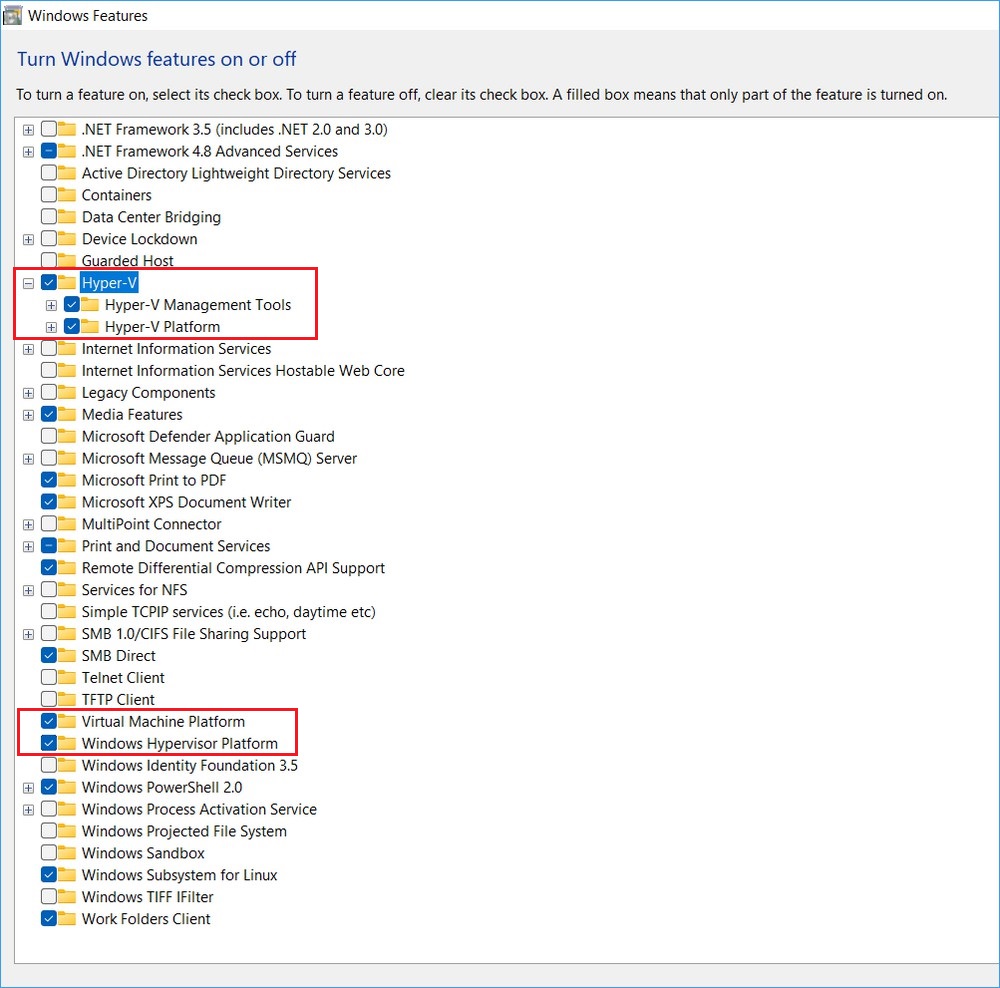
- Click OK and wait for the installation to complete. You may need to restart your computer.
Quick note: It’s uncommon for regular users to enable this feature. Usually, you will only need to enable this feature if you have to set up a solution that requires it.
After your computer restarts, Hyper-V, Virtual Machine Platform, and Windows Hypervisor Platform should be enabled and ready for use. You can now create and manage virtual machines on your Windows system using Hyper-V.
Read more: How To Install Optional Features On Windows 11
Overall, enabling virtualization on Windows 11 is a valuable feature for users who want to explore the capabilities of virtualization technology, enhance their computing experience, and make the most out of their hardware resources.


