
Windows 11 is the latest operating system from Microsoft, and it comes with a lot of new features and improvements over its predecessor. One of the best things about Windows 11 is that it allows users to install optional features that are not included in the default installation. In this article, we will guide you through the process of installing optional features on Windows 11.
Install Optional Features On Windows 11
Learn how to install optional features on Windows 11 to enhance your user experience and add additional functionalities to your system. Follow our step-by-step guide and easily install the features you need.
Add optional features
1. To install optional features on Windows 11, you first need to open the Settings app. To do this, click on the Start button, and then click on the Settings icon. Alternatively, you can use the keyboard shortcut Windows key + I to open the Settings app.
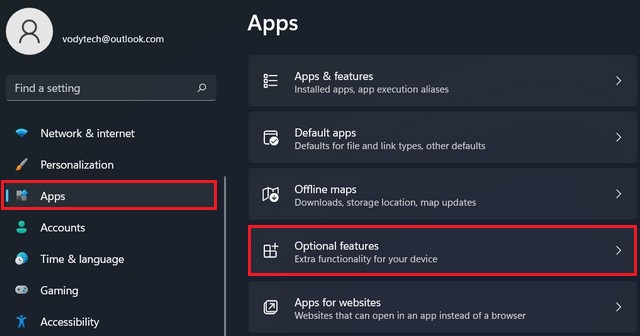
2. Once you are in the Settings app, click on the Apps section on the left-hand side of the window.
4. Scroll down the page until you see the Optional features tab. Click on the tab to open the Optional features page.
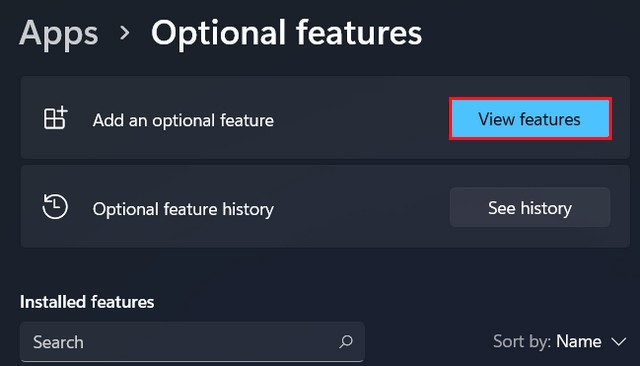
5. On the Optional features page, you will see a list of all the optional features that are available for installation. To install a new feature, click on the “View features” button.
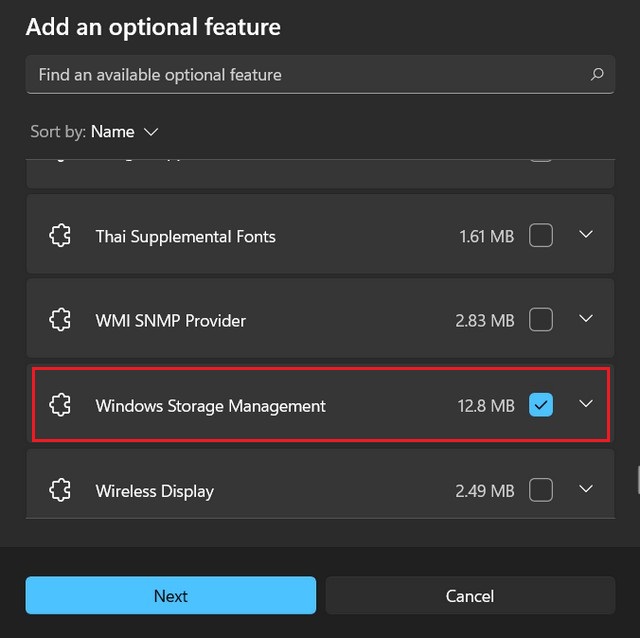
6. You will now see a list of all the optional features that are available for installation. Scroll down the list to find the feature that you want to install, and then click on the checkbox next to it. You can also click on the feature to see a description of what it does.
7. Once you have selected the feature that you want to install, click on the Next button.
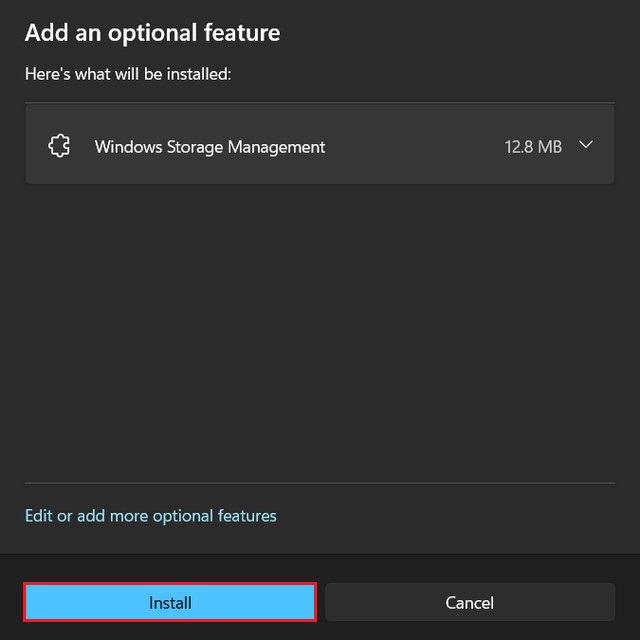
8. Click the Install button. Windows 11 will now download and install the feature. The time it takes to install the feature will depend on your internet connection speed and the size of the feature.
8. After the installation is complete, you will be prompted to restart your computer. Click on the “Restart now” button to restart your computer and complete the installation.
Conclusion
Installing optional features on Windows 11 is a simple and straightforward process. By following the steps outlined in this article, you can easily install any optional feature that you need on your system. Whether you need a specific language pack, a media player, or a development tool, Windows 11 makes it easy to install the software you need to get your work done. If you have any questions or suggestions, please let us know in the comments section. Also, check this guide where you will learn How to view update history on Windows 11.


