
DNS (Domain Name System) is an integral part of the internet infrastructure that translates domain names into IP addresses. Windows 11, the latest operating system from Microsoft, also relies on DNS to resolve domain names to their corresponding IP addresses. At times, DNS-related issues may arise, and flushing the DNS cache can be a useful troubleshooting step. This article will guide you through the process of flushing the DNS cache on Windows 11.
Why flush the DNS cache?
Flushing the DNS cache on Windows 11 can resolve various DNS-related problems, such as incorrect or outdated IP address mappings. When you visit a website or access a network resource, Windows temporarily stores the resolved IP address in its DNS cache. However, if the IP address changes or becomes outdated, it can lead to connectivity issues. By flushing the DNS cache, you can ensure that Windows fetches the latest IP address information from the DNS server.
How to Flush DNS Cache on Windows 11
There are various ways to clear the DNS cache. You have the option to utilize the Command Prompt or PowerShell. Presented below are two methods to clear DNS on Windows 11:
1. Using Command Prompt
To flush the DNS cache on Windows 11, you can follow these steps:
-
- Open Command Prompt: Press the Windows key, search for Command Prompt, and click on the app to launch it.
- Run Command Prompt as an administrator: Right-click on the Command Prompt app and select Run as administrator. Confirm any User Account Control prompts if they appear.
- Flush the DNS cache: In the Command Prompt window, type the following command and press Enter:
ipconfig /flushdns
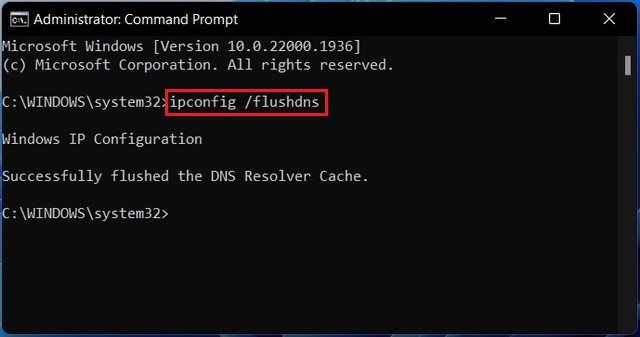
Confirmation message: After executing the command, you should see a message that says, “Successfully flushed the DNS Resolver Cache.”
Congratulations! You have successfully flushed the DNS cache on your Windows 11 computer. This process clears the cache and forces your computer to retrieve fresh DNS information the next time you access a website or network resource.
2. Using Windows PowerShell
To flush the DNS cache on Windows 11 using PowerShell, you can follow these steps:
- Open the Start menu and search for “PowerShell.”
- Right-click on “Windows PowerShell” in the search results and select Run as administrator. This will open an elevated PowerShell session with administrative privileges.
- In the PowerShell window, type the following command and press Enter:
Clear-DnsClientCache
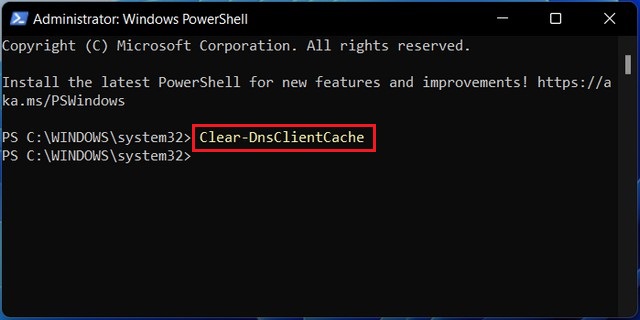
That’s it! The DNS cache on your Windows 11 computer has been successfully flushed using Windows PowerShell.
How to flush DNS cache from browser on Windows 11
To flush the DNS cache from a browser on Windows 11, you can follow these steps:
Open the browser you want to flush the DNS cache for (e.g., Google Chrome, Mozilla Firefox, Microsoft Edge).
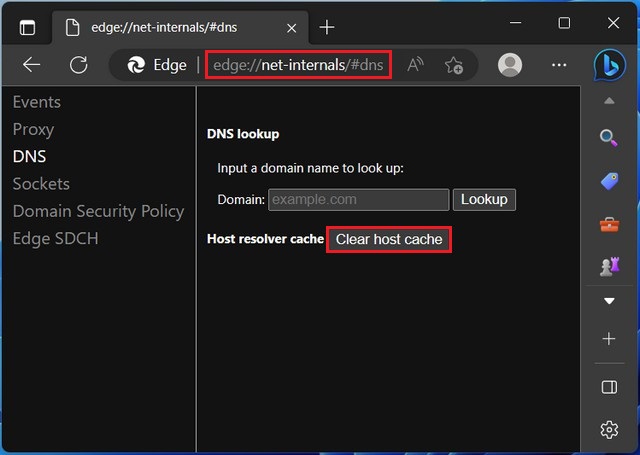
In the address bar of the browser, type the following command and press Enter:
chrome://net-internals/#dns(for Google Chrome)about:networking#dns(for Mozilla Firefox)edge://net-internals/#dns(for Microsoft Edge)
This will open the browser’s internal network settings page.
Look for the “Clear host cache” or “Clear DNS cache” option on the page. The exact wording may vary depending on the browser.
Click on the “Clear host cache” or “Clear DNS cache” button. This action will clear the DNS cache for the browser.
Once the cache is cleared, you may close the internal network settings page.
Please note that flushing the DNS cache in the browser only affects the DNS resolution performed by the browser itself. It doesn’t clear the DNS cache of your operating system.
Read more: How to uninstall an update on Windows 11
Flushing the DNS cache on Windows 11 can be a simple yet effective method to resolve DNS-related issues. Whether you choose to use Command Prompt or Windows PowerShell, both methods allow you to clear the DNS cache and ensure that Windows fetches the latest IP address information when accessing websites or network resources. By following the step-by-step instructions outlined in this article, you can easily flush the DNS cache and improve your browsing and network connectivity experience on Windows 11.


