
Windows 11 is the latest version of Microsoft’s operating system, featuring a sleek and modern interface. Like any operating system, Windows 11 periodically releases updates to improve performance, security, and add new features. However, sometimes an update may cause compatibility issues or other problems on your system. In such cases, it may be necessary to uninstall the update. In this article, we will guide you through the process of uninstalling an update on Windows 11.
Uninstall update on Windows 11 21H2
Uninstalling updates on Windows 11 can be done through the Settings app. Follow these steps to uninstall an update:
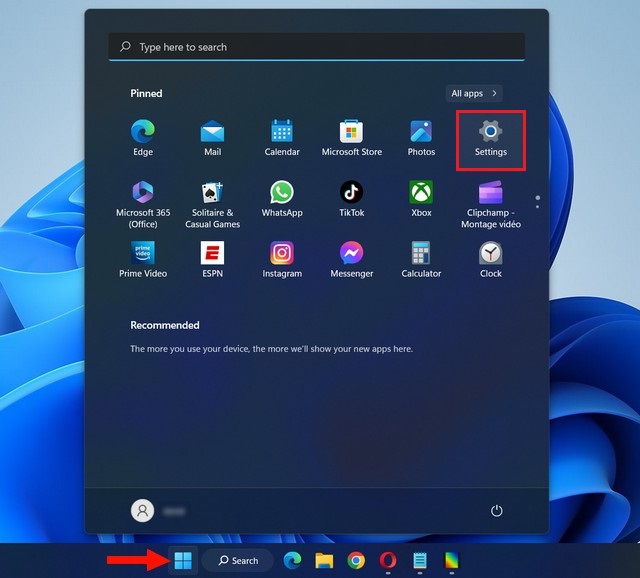
1. Open the Start menu by clicking on the Windows icon located at the bottom left corner of the screen or by pressing the Windows key on your keyboard.
2. Click on the Settings icon, which resembles a gear, to open the Settings app.
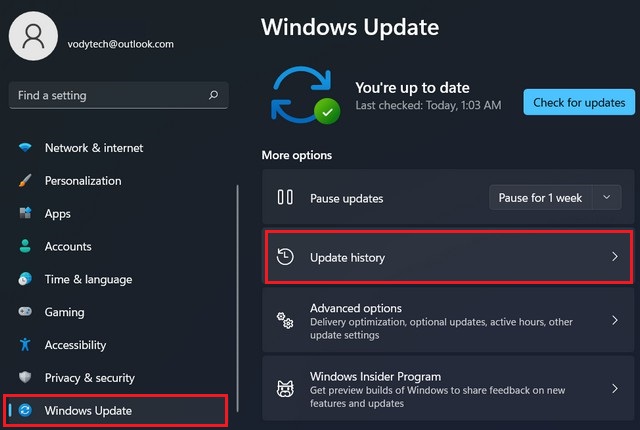
3. In the Settings app, click on Windows Update in the left-hand menu.
4. On the Windows Update page, click on the Update history option.
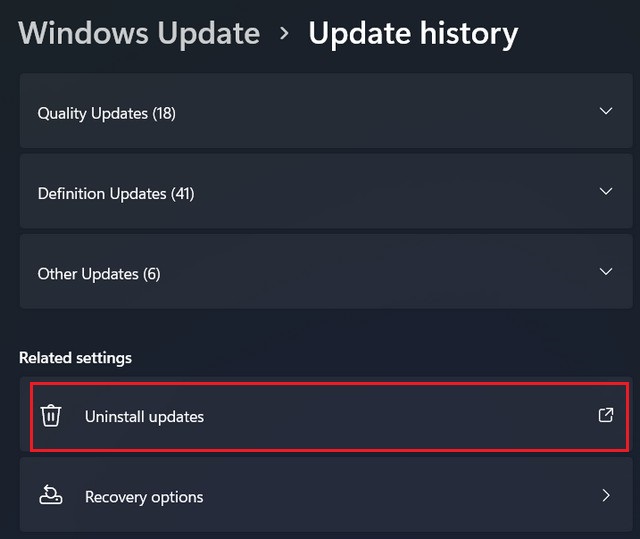
5. Click on the Uninstall updates option.
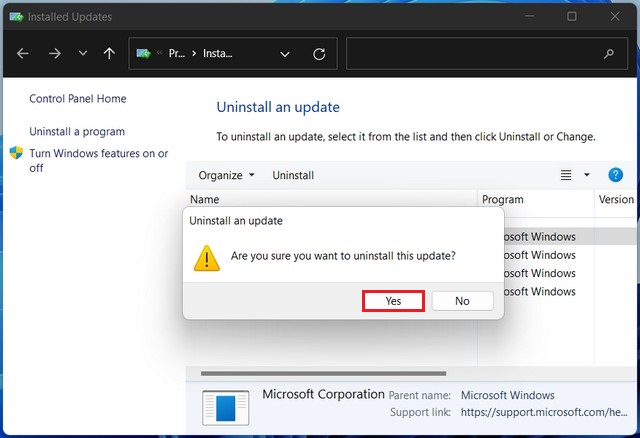
6. You will see a list of installed updates. Locate the update you want to uninstall and click on it.
7. Click on the Uninstall button that appears. A confirmation window will pop up asking if you want to uninstall the update.
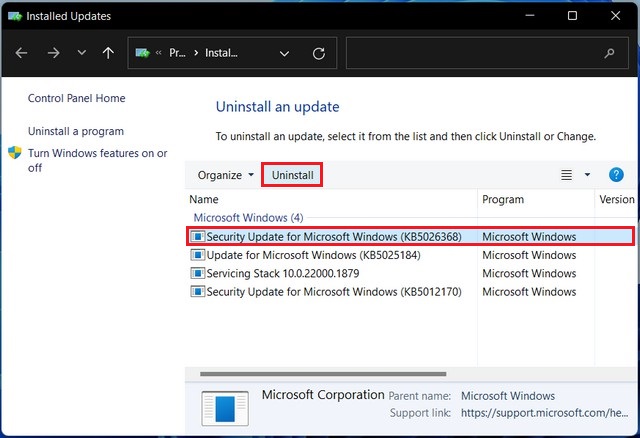
8. Click on the Yes button to proceed with the uninstallation.
Windows will start uninstalling the update. This process may take some time.
Once the update has been successfully uninstalled, Windows 11 will prompt you to restart your computer to complete the process.
After following these steps, the selected update should be uninstalled from your Windows 11 system. Keep in mind that uninstalling updates can sometimes lead to compatibility or security issues, so it’s generally recommended to only uninstall updates if they are causing significant problems on your system.
Uninstall update on Windows 11 with Command Prompt
To uninstall an update on Windows 11 using the Command Prompt, follow these steps:
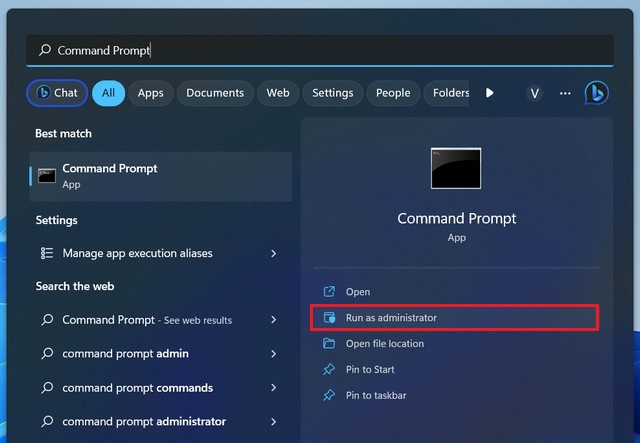
1. Press the Windows key on your keyboard to open the Start menu. Type Command Prompt and select Run as administrator from the search results. This will open the Command Prompt with administrative privileges.
2. In the Command Prompt window, type the following command and press Enter to list all the installed updates:
wmic qfe list brief /format:table
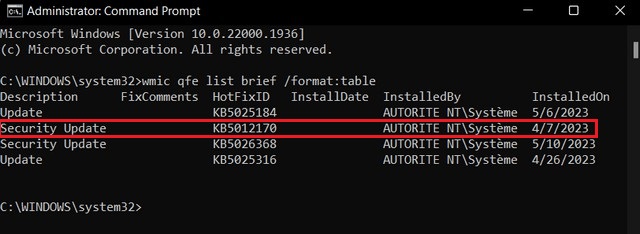
3. A list of installed updates will be displayed. Locate the update you want to uninstall and note down its HotFixID or InstalledOn value.
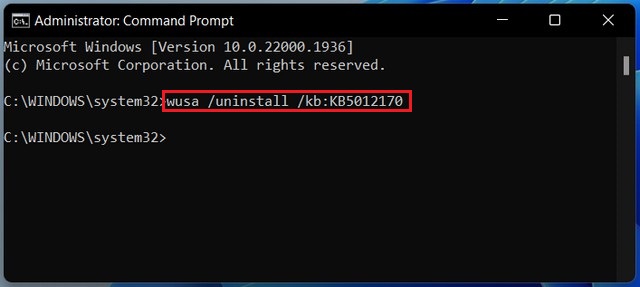
4. To uninstall the update, type the following command and press Enter:
wusa /uninstall /kb:HotFixID
Replace HotFixID with the actual HotFixID value of the update you want to uninstall.
This example removes the update KB5012170 from Windows 11:
5. Follow the on-screen prompts to complete the uninstallation process. Restart your computer if prompted to do so.
Read more: How to disable automatic updates on Windows 11
Uninstalling an update on Windows 11 can help resolve compatibility issues or other problems that may arise after an update is installed. By following the step-by-step guide outlined in this article, you can easily remove an update from your system and restore it to a previous state. However, it’s worth noting that updates often provide important security and performance enhancements, so it’s generally recommended to uninstall updates only when necessary and consult with Microsoft or professional support if you encounter persistent issues.


