
Windows is a pretty popular operating system, and it has come a long way since its inception. Microsoft has incorporated a lot of new technologies and mechanisms in its top-of-the-line Operating System to make it more efficient and useful. Delivery Optimization Cache (DAC) is one of the revolutionary methods which allow Windows 10 users to get Windows updates or send one to another Windows 10 computer on your network.
In this way, all the computers on the same network can get Windows Update without using a lot of bandwidth. Now, by default, the space for DAC is set to 10 Gbps which is surely not a problem on high-end computers with good storage, but it’s certainly not an ideal option for computers with low storage. If you have a computer with low storage and you want to optimize the Delivery optimization cache, we can help you with it. In this Vodytech Guide, you will learn how to Optimize Delivery Optimization Cache in Windows 10. Let’s get started.
What are the Benefits of having a Delivery Optimization System?
In the introduction, we explained what Delivery Optimization System is, and before we explain how you can optimize it, it’s important that we explain the benefits of the system. Here are some of the Benefits of having a Delivery Optimization System.
Bandwidth Efficiency
As we explained earlier, the biggest benefit of having a Delivery Optimization System is that it won’t use a lot of your Internet bandwidth. For example, if one of the Windows Device on your network get the Update, it will replicate that Update to the other computers on the network, which will result in saving your bandwidth, and in the long run, you can save good money, especially if you have metered connection.
Security
Lately, Microsoft is mainly focusing on making Windows systems secure, and having systems like Delivery Optimization allow the company to provide updates to Windows computers more securely. As Windows computers get updates from another Windows computer on the same network from a single source, there are very few chances that someone would mess with them, and computers will stay safe from viruses, adware, and other threats.
How to Optimize Delivery Optimization Cache in Windows 10?
Now that you know what’s the benefits of Delivery Optimization Cache on Windows 10 let’s explain how you can optimize it.
When it comes to optimizing DAC, there are two ways to do it.
- Optimization via Group Policy Editor
- Optimization via Registry Editor
How to Optimize Delivery Optimization Cache in Windows 10 via Group Policy Editor
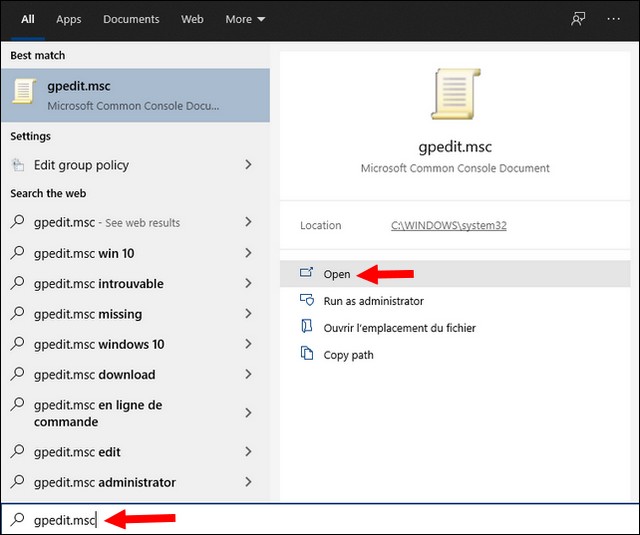
Group Policy Editor is a tool that is available by default in most Windows, and you can easily find it by typing “gpedit.msc” in the search bar of Windows. However, if it’s not enabled by default, you can easily get it on your system by following these steps.
1. Go to the search box and type CMD and run it as administrator.
2. Once it’s opened, type the following command
dism /online /norestart /add-
package: “%SystemRoot%servicingPackages{{PackageFileName}}
3. Now press enter to run it.
Once it’s installed, type “gpedit.msc” on the search box and follow these steps to optimize Delivery Optimization Cache.
1. Find “Computer Configuration” and click it.
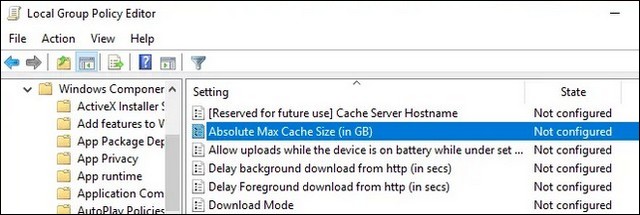
2. Now go to “Administrative Templates > Windows Components > Delivery Optimization”.
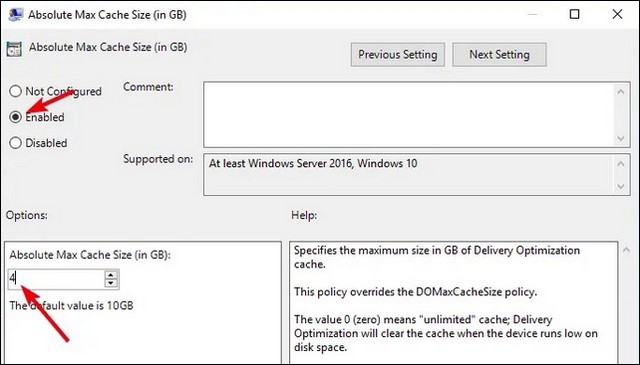
3. Now click “Absolute Max Cache Size (in GB)”.
4. Once it’s opened, click on Enabled and then set the Size to the Size of your choice. We recommend that you set the minimum Size to 3-4 GB.
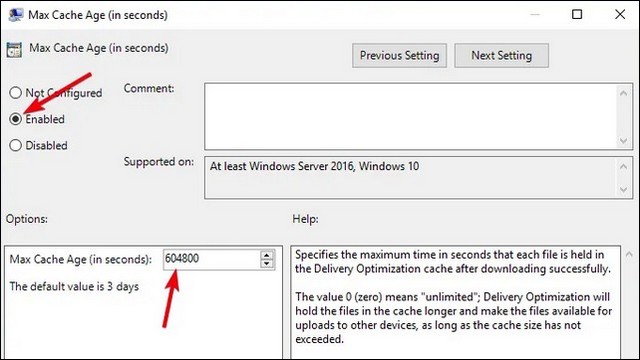
5. Now go back and click on “Max Cache Age (in Seconds)”.
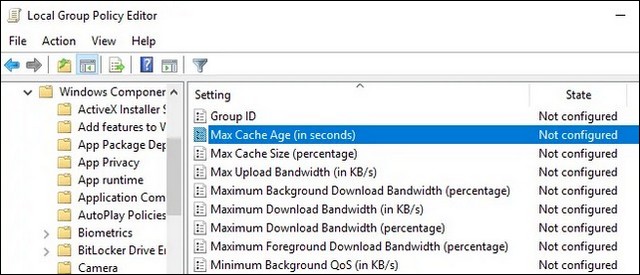
6. Here click Enabled and set the duration of your choice. The default duration is 3 days, but you can set the duration according to your choice in seconds.
Now restart your system, and Delivery Optimization Cache will be optimized according to your defined parameters.
How to Optimize Delivery Optimization Cache in Windows 10 via Registry Editor
Registry Editor is another tool thatyou can use to Optimize Delivery Optimization Cache. We recommend this method mainly for Windows 10 Home Users because the first method is not enabled by default for them. Here’s how you can use Registry Editor to Optimize Delivery Optimization Cache.
1. Go to Search Box on Windows and type “regedit”.
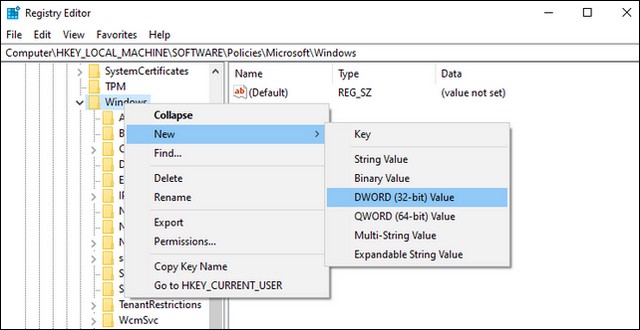
2. Once Windows Registry is Opened, type “HKEY_LOCAL_MACHINE\SOFTWARE\Policies\Microsoft\Windows” on the address bar.
3. Now right-click on Windows and select “New”, and then select “DWORD (32-bit) Value”.
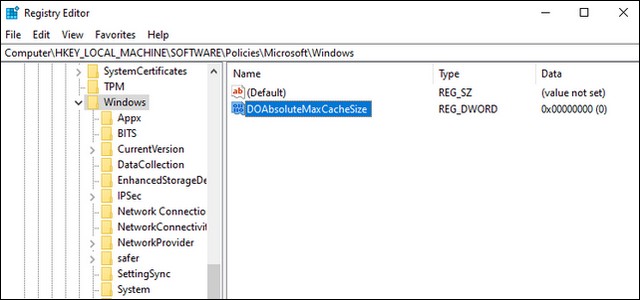
4. In the next step, name the value “DOAbsoluteMaxCacheSize”.
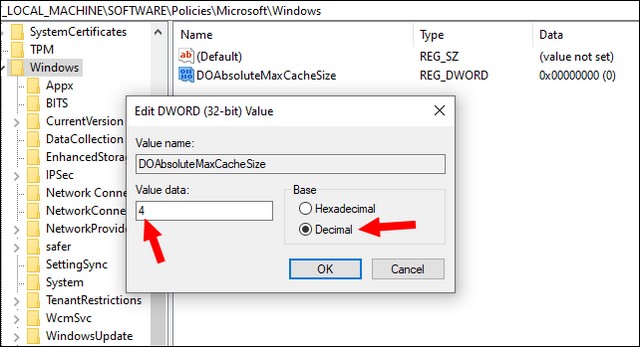
5. Now click on the newly created value and set the Size in the Value Data section, and set the base to decimal.
6. In the next step, right-click again to create another Value with the same DWORD (32-bit) Value and name it “DOMaxCacheAge” and hit enter.
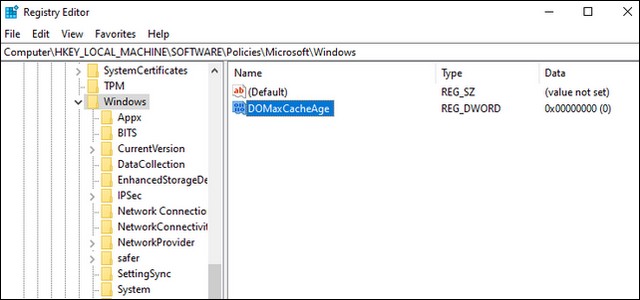
7. Now click on it and set the value to your desired number in seconds, and make sure the base is set to decimal.

Now restart your system, and Delivery Optimization Cache will be optimized according to your set values.
Is it Safe to Optimize Delivery Optimization Cache?
Yes, it’s completely safe to Optimize Delivery Optimization Cache but make sure that you follow the steps and don’t change anything else as you can potentially mess up with other delicate features of your system.
Conclusion
That’s all, folks. Delivery Optimization is surely a very useful system that you can use to make sure that the other systems on your network get timely and secure updates. It works automatically, and you can use the above methods to optimize it according to your requirements. Also, we recommend that you don’t set the value too low as sometimes Windows release big updates, and setting the low storage can cause issues. We hope that you found this guide useful and if you want to cover more topics for you, let us know in the comments. Also, check this guide where you will learn how to Disable USB Ports in Windows 10.


